Label Options v3.0
- Laura Lyonette (Unlicensed)
- Laura Price
Commercial and in Confidence
The information contained in this document is confidential. No part of this document may be reproduced, disclosed to any third party, or issued in any form or by any means without the express written permission of Intersoft Systems & Programming Ltd.
Contents
Document Controls
1. Introduction
2. Configure Label Options
1.1 Configure API Label Options
1.2 Configure Shipment Processing Label Options
1.2.1 Label Formats
1.2.2 Customise Integrated Label
3. Example Labels
3.1 Label on a Roll
3.2 Integrated Label
3.3 Label with CN23 Included
Appendix 1 – Glossary
Table of Figures
Figure 1 - Label Options screen
Figure 2 - API Label Options
Figure 3 - Shipment Processing Label Options
Figure 4 - Label Format drop-down
Figure 5 - Label on a Roll format
Figure 6 - Integrated A4 (Landscape) Single Label format
Figure 7 - Integrated A4 (Portrait) Top Left format
Figure 8 - Integrated A4 (Portrait) Top Right format
Figure 9 - Integrated A4 (Portrait) Bottom Left format
Figure 10 - Integrated A4 (Portrait) Bottom Right format
Figure 11 - Integrated Label Configuration Settings
Figure 12 - Example Label on a Roll
Figure 13 - Example Integrated Label
Figure 14 - Integrated Label with order information expanded onto a second page
Figure 15 - Label on a Roll with CN23 included
Introduction
Intelligent Shipper users can choose to print various label designs, from the standard thermal labels to labels integrated on an A4 document with order information included.
The Label Options functionality allows Customer role users to configure their label settings so that labels will be generated in the required format.
Configure Label Options
To configure label options, select Maintenance from the left-hand menu. Select Label Options from the Maintenance menu and the Label Options screen will open. 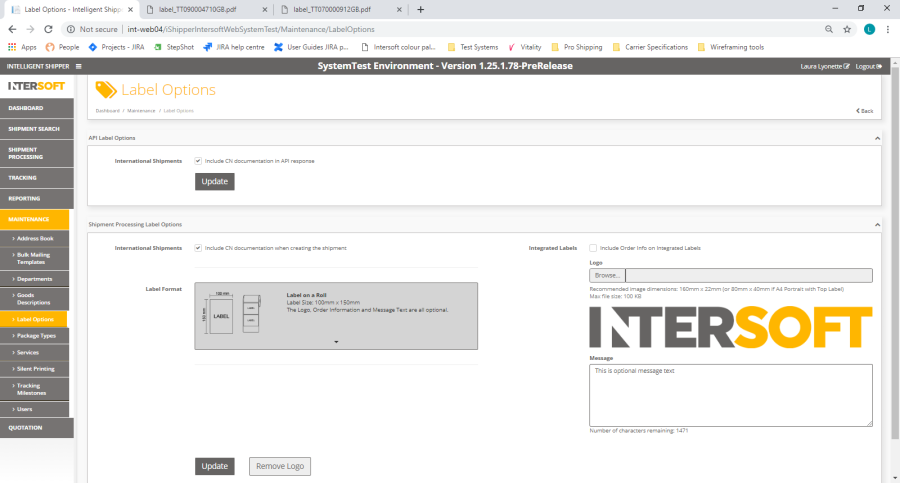
Figure 1 - Label Options screen
The screen is split into two sections:
- Configure API Label Options – label settings for shipments created via API
- Configure Shipment Processing Label Options – label settings for shipments created via Bulk Mailing and Booking Wizard
Configure API Label Options
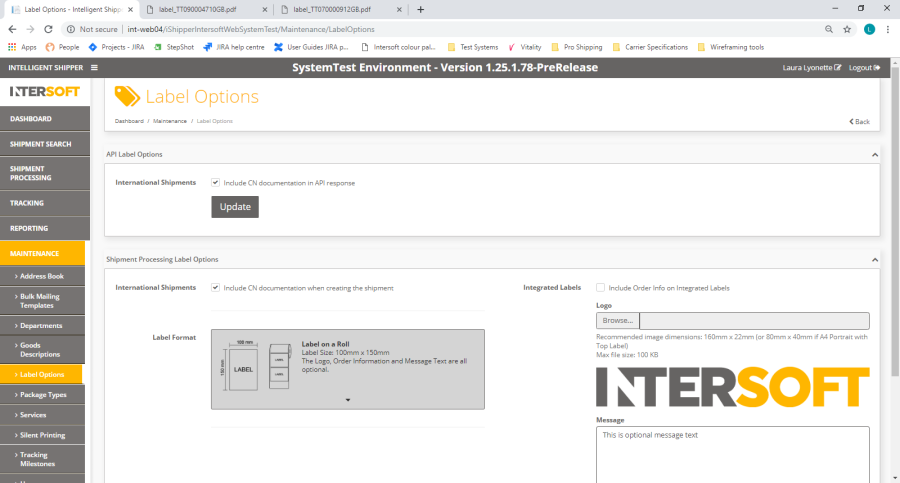
Figure 2 - API Label Options
To configure your label options for shipments created via API:
- The "Include CN23 documentation when creating the shipment" tick box sets whether the CN23 customs document will be included with the label when international shipments are created for destinations and carriers requiring a CN23. The box will be ticked by default and can be unticked if required.
- Click the "Update" button to save the label options you have selected.
Configure Shipment Processing Label Options
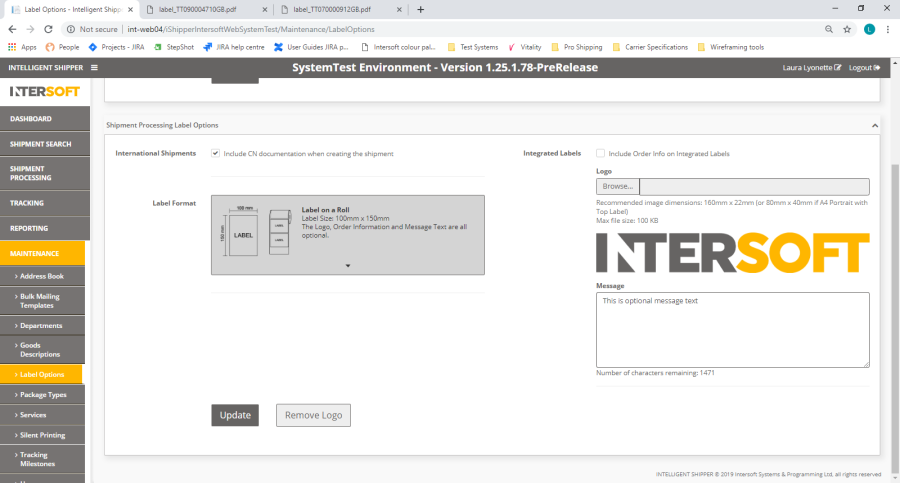
Figure 3 - Shipment Processing Label Options
To configure your label options for shipments created via Bulk Mailing and Booking Wizard:
- The "Include CN23 documentation when creating the shipment" tick box sets whether the CN23 customs document will be included with the label when international shipments are created for destinations and carriers requiring a CN23. The box will be ticked by default and can be unticked if required.
- In the "Label Format" drop-down, select your required label size and layout from the options available – this includes labels on a roll and an integrated label included on an A4 page that can be configured with the order information, your logo and any additional text you require. The list contains an image showing the layout of each label format and a text description containing further information. See the Label Formats section for more details on the available label formats.
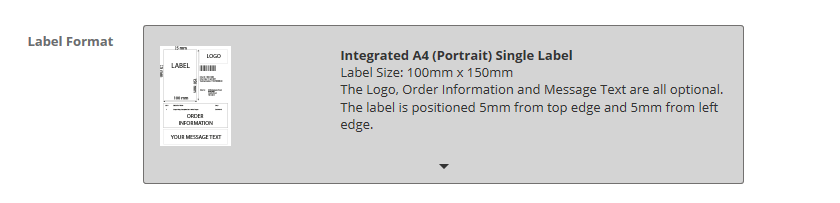
Figure 4 - Label Format drop-down
- Click the "Update" button to save the label options you have selected.
If you are using the label on a roll format (standard thermal labels) then these are the only configuration settings that are needed. When shipments are created the label will then be created as a 6-inch x 4-inch label in the carrier's label format.
If you are using an integrated label format, there are further configuration settings to customise the information that is displayed on the remainder of the A4 page. See the Customise Integrated Label section for more details on the additional configuration settings for integrated labels.
Label Formats
The "Label Format" drop-down allows you to select your required label size and layout from the following options:
Label on a roll: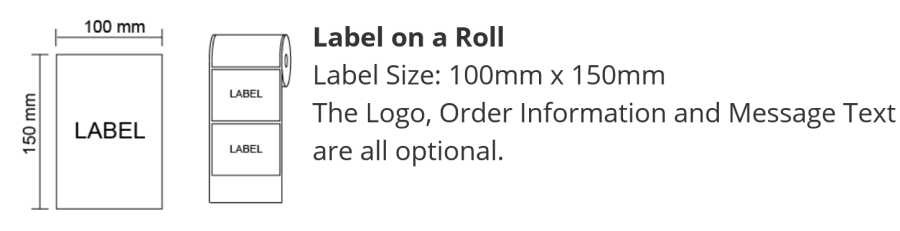
Figure 5 - Label on a Roll format
Integrated A4 (Landscape) Single Label: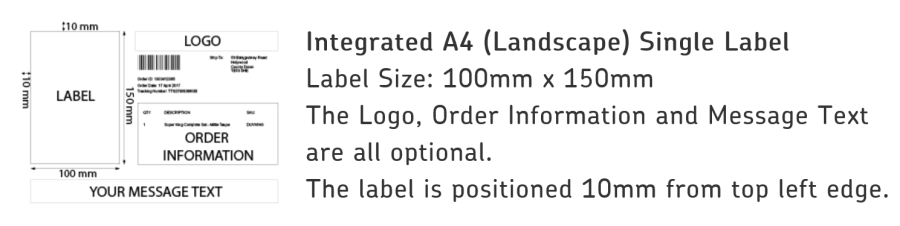
Figure 6 - Integrated A4 (Landscape) Single Label format
Integrated A4 (Portrait) Top Left Label: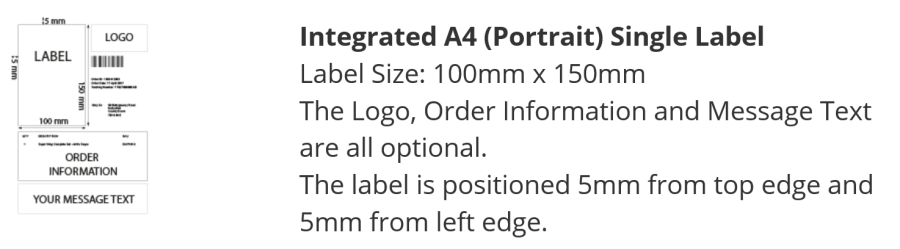
Figure 7 - Integrated A4 (Portrait) Top Left format
Integrated A4 (Portrait) Top Right Label:
Figure 8 - Integrated A4 (Portrait) Top Right format
Integrated A4 (Portrait) Bottom Left Label:
Figure 9 - Integrated A4 (Portrait) Bottom Left format
Integrated A4 (Portrait) Bottom Right Label: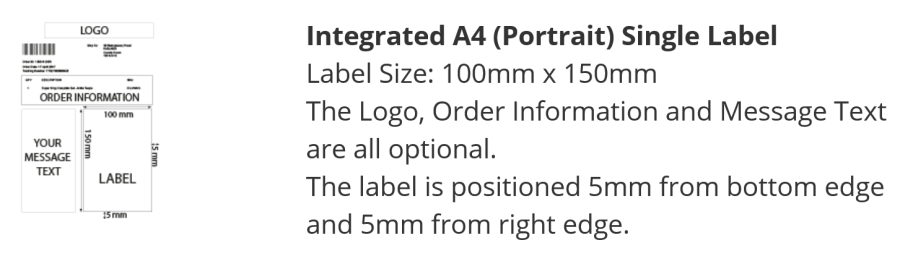
Figure 10 - Integrated A4 (Portrait) Bottom Right format
Customise Integrated Label
If you are using the integrated label format then you can set some additional configuration options to customise the information that is displayed on the A4 page along with the label. 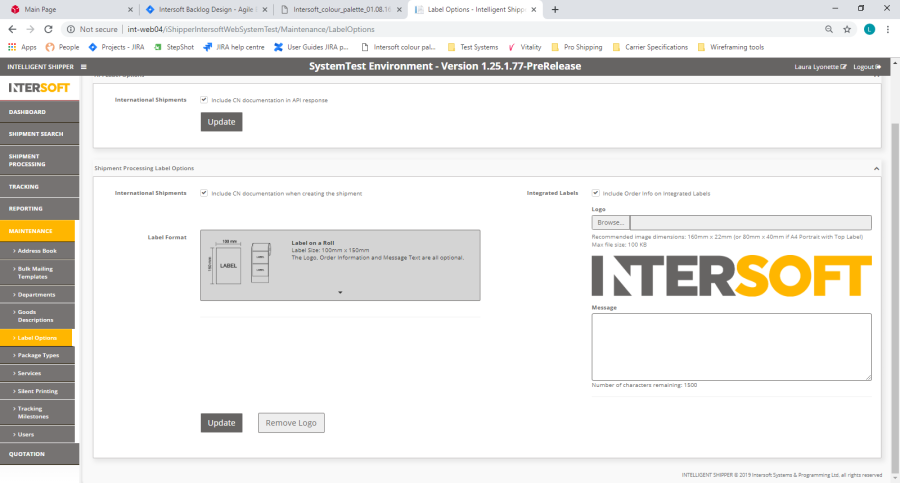
Figure 11 - Integrated Label Configuration Settings
To customise the integrated label page:
- Tick the "Include order info on integrated labels" tick box if you want to display order information on the A4 page along with the label. If order information is selected then the integrated label will contain a list of the items in the order and the quantity, description and SKU code for each item.
- If you want to include your company logo on the integrated label page, then click the "Browse" button and select the logo you want to use.
- Once you have selected a logo a "Remove Logo" button is displayed on screen. This can be used to remove the logo from the integrated label, or you can change the logo by clicking "Browse" and selecting a different logo image.
- An optional message of up to 1500 characters can be added to the integrated label. If you want to add a message to the integrated label, enter the text that you require in the "Message" text box.
NOTE: If a message is entered then check that it will be displayed on the label as you expect by previewing the label – see step 6 below.
- Click the "Update" button to save your changes. A "Preview" button will then be displayed.
- Click the "Preview" button to download an example of how the label will be generated using the settings you have configured.
Example Labels
Examples of the Label on a Roll and Integrated Label formats are included below. These are included as examples only; the exact label format will vary depending on the carrier used for the shipment.
Label on a Roll
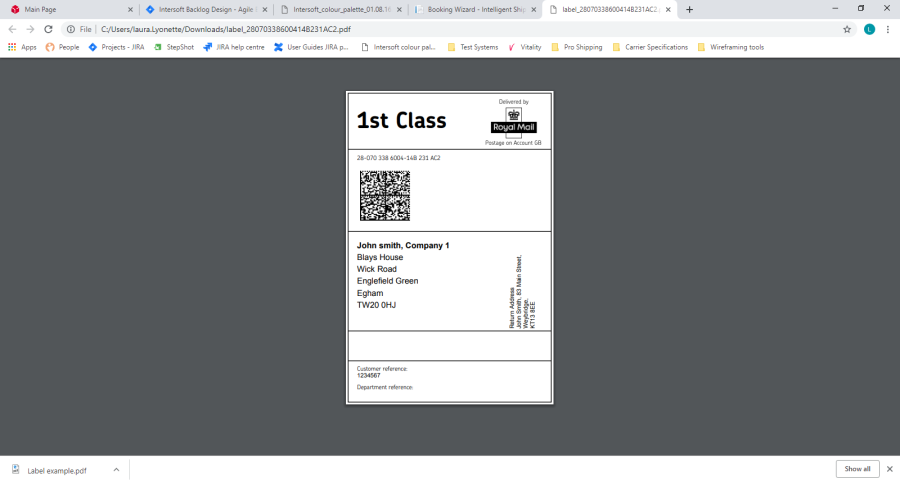
Figure 12 - Example Label on a Roll
The above image shows an example Label on a Roll format label for a Royal Mail shipment.
For single package shipments one label will be generated for the shipment.
For multi-piece shipments (containing multiple packages) a label will be generated for each package in the shipment.
Integrated Label
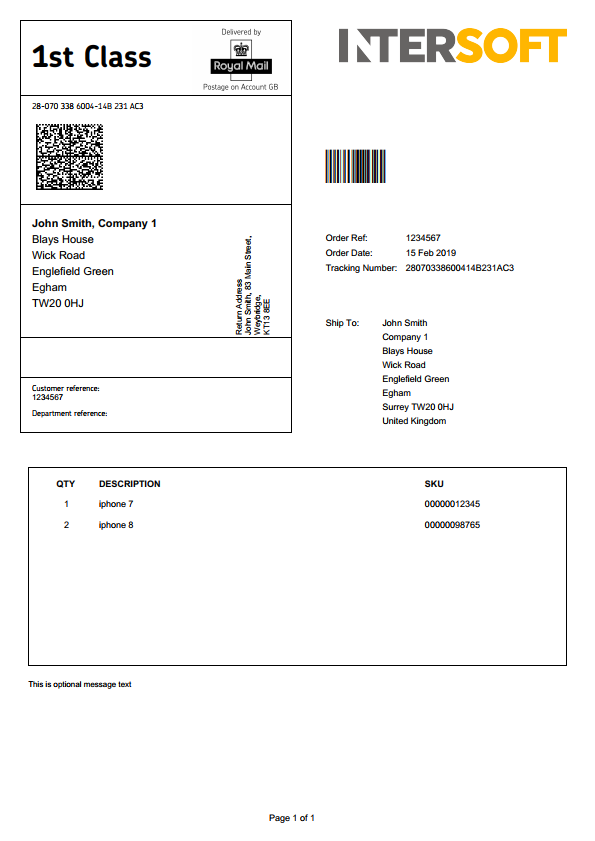
Figure 13 - Example Integrated Label
The above image is an example of an integrated label using the A4 Portrait Top Right format. The integrated label may be displayed differently depending on the label format and configuration settings that have been chosen in Label Options.
If order information has been included on the integrated label and an item description or SKU code is too long to fit on one line, then the text will wrap onto the next line. If the item list is too long to fit on one page then it will expand onto a second page as shown in figure 12 below. The second page will contain the item list only; it will not contain the shipment label or any message text that been configured. 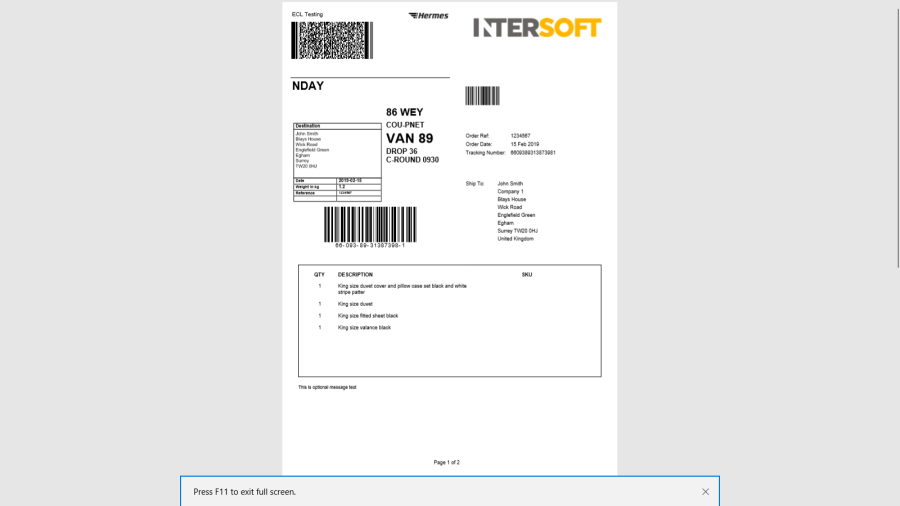
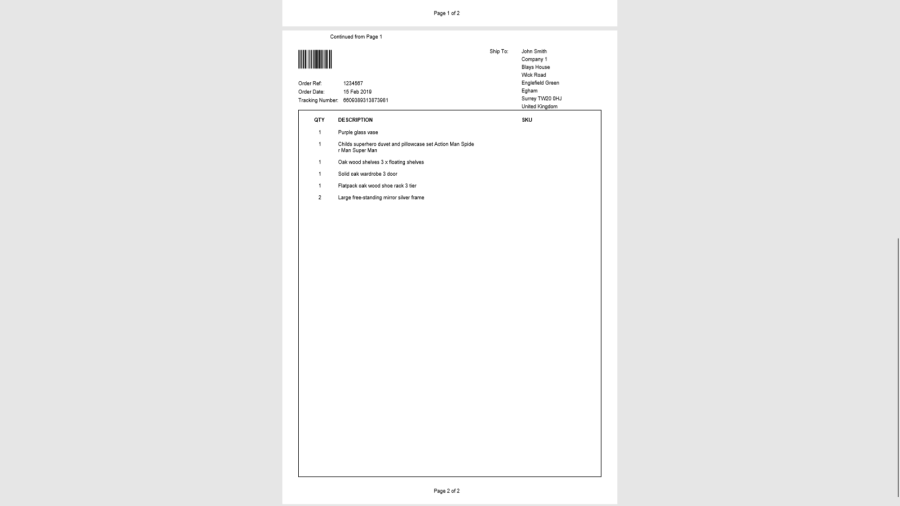
Figure 14 - Integrated Label with order information expanded onto a second page
For single package shipments one label will be produced for the shipment.
For multi-piece shipments (containing multiple packages) a label will be produced for each package in the shipment but order information will only be shown on the first package label. If the order information spans over multiple pages then all pages for the first label will be printed first, then the integrated label pages for each of the remaining packages in the shipment will be printed (without order information).
Label with CN23 Included
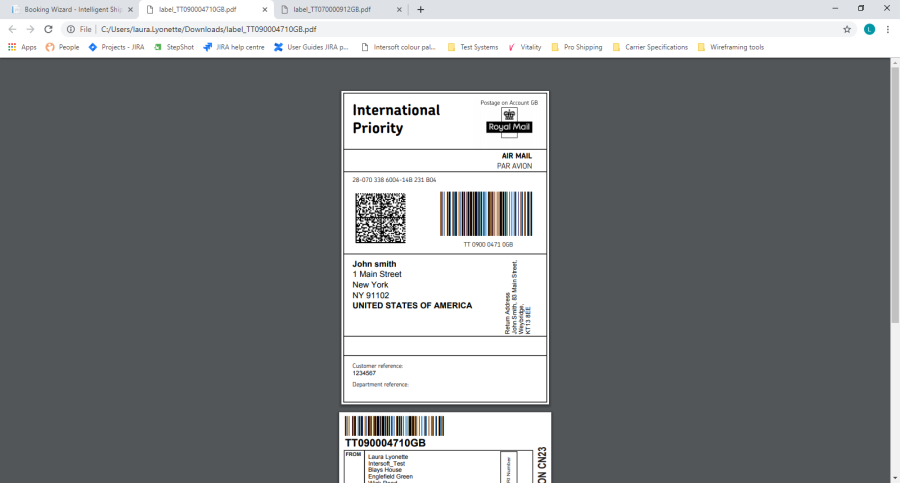
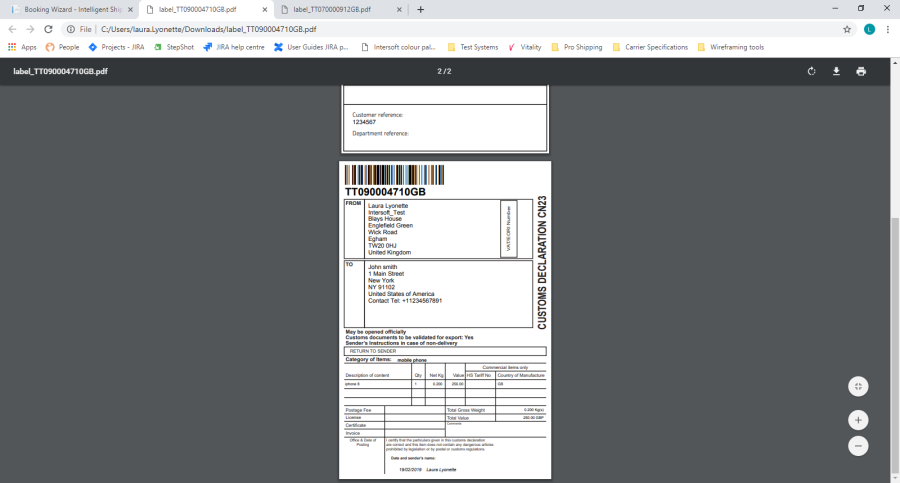
Figure 15 - Label on a Roll with CN23 included
The above image shows a Label on a Roll format label for an international shipment with a CN23 included with the label image.
Appendix 1 – Glossary
Term | Definition |
|---|---|
CN23 | A customs document used for international postal shipments where customs documentation is required. A CN23 is only required for postal shipments, for other shipments requiring customs documentation either a Proforma Invoice or Commercial Invoice must be provided. Check with the carrier as to which customs documentation they require. |
Customer User | the core users of the system who will be creating, processing and closing out shipments. This user role will be assigned to a customer account. See the User Roles manual for more details on the access Customer users have to the system. |
Integrated Label | A label format that prints the shipment label on an A4 page along with the order reference, tracking number, destination address and the following configurable information – company logo, optional message text and a list of items in the order. |
Label on a Roll | A shipment label that is printed in the standard thermal label format as a 6-inch x 4-inch size label. |
Multi-piece shipment | A shipment for a single order containing multiple packages. See the document "Intelligent Shipper Carrier Integrations and Features" for a list of which carriers allow multipiece shipments to be created. |
SKU | Stock Keeping Unit – a unique identifying code assigned to a product. |