Create Shipment using Carrier Packaging v2.0
Commercial and in Confidence
The information contained in this document is confidential. No part of this document may be reproduced, disclosed to any third party, or issued in any form or by any means without the express written permission of Intersoft Systems & Programming Ltd.
Contents
1. Document Controls
2. Table of Figures
3. Introduction
4. Create Shipment using Carrier Packaging via Booking Wizard
4.1. Add a Carrier Package Type
4.2. Create a Shipment via Booking Wizard with Carrier Packaging
5. Create a Shipment using Carrier Packaging via Bulk Mailing.
5.1. Create Bulk Mailing Template containing Package Type
6. Appendix 1 - Glossary
Table of Figures
Figure 1: Maintenance Screen
Figure 2: Add Package Type Screen
Figure 3: Package Types Screen
Figure 4: Add Package Type Screen
Figure 5: Shipment Processing Screen
Figure 6: Booking Wizard- Collection Info & Address Tab Screen
Figure 7: Booking Wizard – Delivery Address Tab Screen
Figure 8: Booking Wizard – Shipment Contents Tab Screen
Introduction
Some of the carriers integrated with Intelligent Shipper offer their own shipment packaging, which can be used as an alternative to the customer's own packaging and may have lower shipping costs associated. Intelligent Shipper allows carrier packaging to be used for FedEx and UPS shipments.
This manual instructs the Customer User on how to setup carrier packaging in the system and create shipments using carrier packaging via Booking Wizard and Bulk Mailing. Once Shipment is created with Carrier Package Type and the label is generated. The package type name will be sent to the carrier to inform their shipping charge calculations and charged accordingly.
Create Shipment using Carrier Packaging via Booking Wizard
To create shipments using carrier packaging via the Booking Wizard, the packaging must first be setup in the Package Types MAINTENANCE screen.
Add a Carrier Package Type
- Customer user logs into Intelligent Shipper.
- Click MAINTENANCE from the Menu and Select Add on the Package Types option.
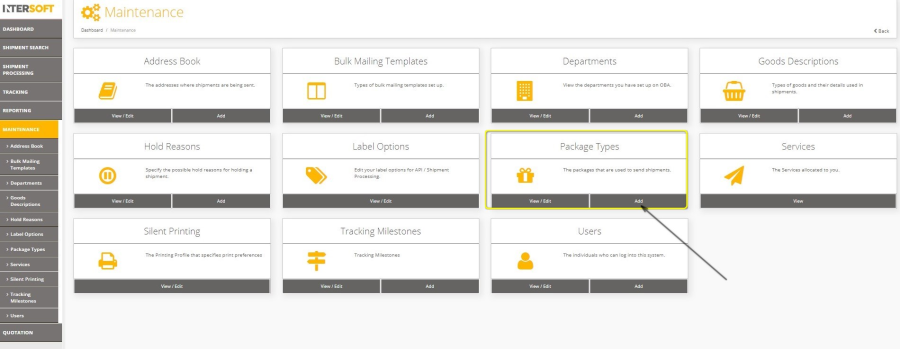
Figure 1: Maintenance Screen
- Add Package Type Screen will open (see figure 2).
- Enter details in the required fields shown in figure 2. (NOTE: Package Type Name must be Unique.)
- If you are setting up a carrier package type for use when creating shipments via Booking Wizard, the Package Type Name must exactly match the carrier's name for the package type you want to use. If the Package Type Name does not match the carrier's packaging name exactly then the carrier packaging will not be used, and this may result in carrier over-charges.
- See the document "Intelligent Shipper Carrier Integrations and Features" for a list of the carrier package types that are supported in Intelligent Shipper.
- For setting up your own packaging in the Package Types screen, it is important that the Package Type Name does not contain any of the carrier package type names supported in the system to avoid being overwritten by the system carrier packaging.
- E.g. UPS have a package type called 'Tube'. If you have your own package type named 'Tube' you must enter a different Package Type Name when setting up your own Tube packaging, such as 'Own Tube' to avoid UPS showing UPS Tube packaging used instead of your own packaging.
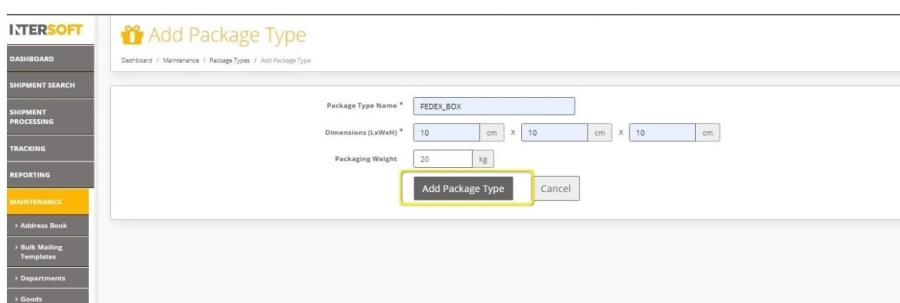
Figure 2: Add Package Type Screen
- Click Add Package Type.
- Package Types screen is displayed. Check that the package type added in the steps 1 & 2 is listed in the Package Type list.
- Package Type is successfully added to Package Type List.
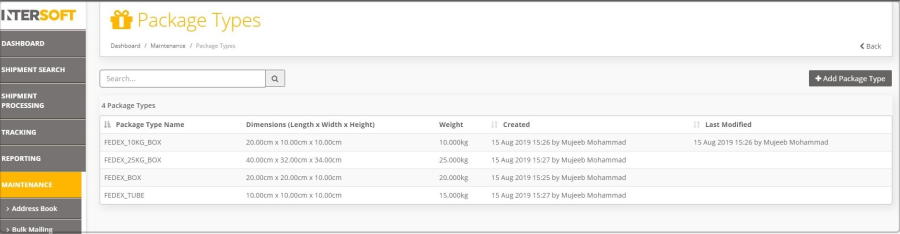
Figure 3: Package Types Screen
- Duplication of Package Type names are not supported as the Package Type names must be Unique.
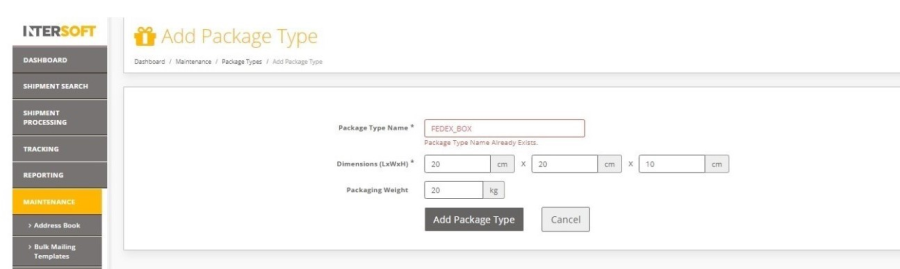
Figure 4: Add Package Type Screen
Create a Shipment via Booking Wizard with Carrier Packaging
- Logged in as a Customer user, click on SHIPMENT PROCESSING menu.
- Shipment Processing screen will open.
- Click on Booking Wizard button. (See Figure 5)
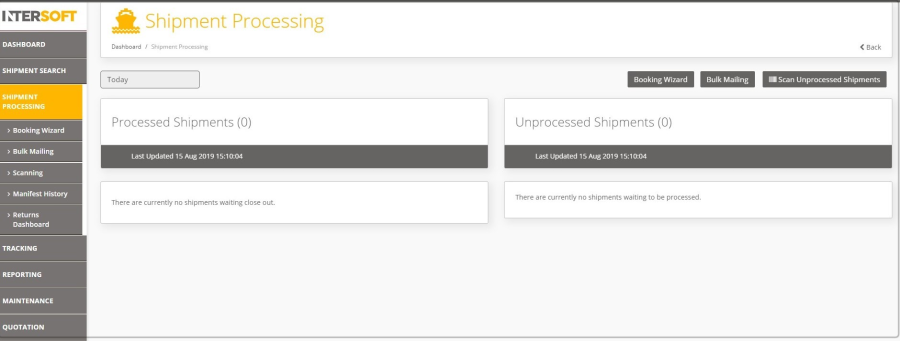
Figure 5: Shipment Processing Screen
- Booking Wizard screen will open. See the "Booking Wizard User Guide v3.0" manual in JIRA for full instructions on creating shipments using the Booking Wizard.
- Enter Collection Info & Address details and Click Next. Destination Address tab screen is displayed.
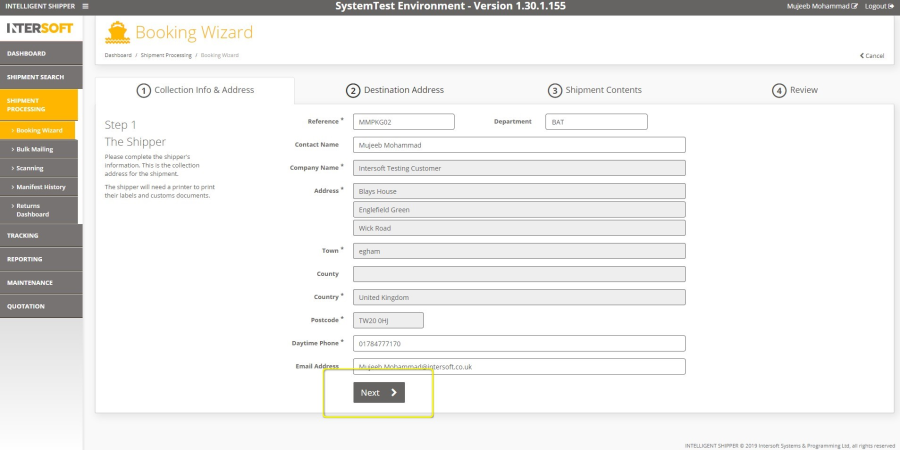
Figure 6: Booking Wizard- Collection Info & Address Tab Screen
- Enter Destination Address details and Click Next. Shipment Contents tab screen is displayed.
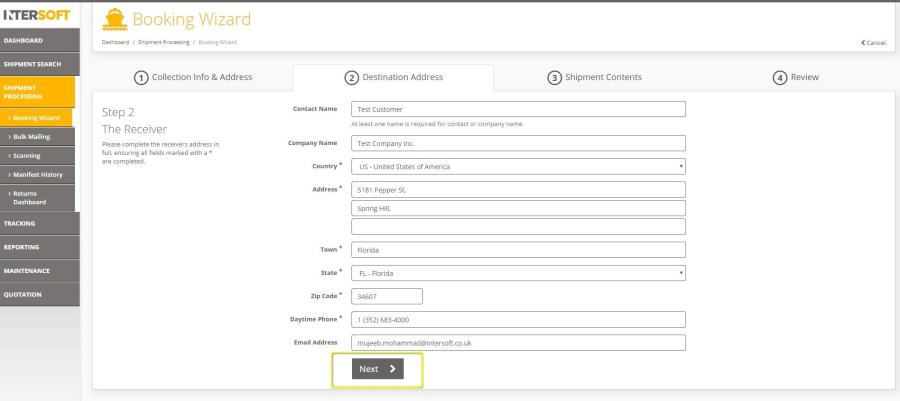
Figure 7: Booking Wizard – Delivery Address Tab Screen
- Enter the Shipment Contents and Package Type Name created in the step 7 of Section 4.1 and Click Next
NOTE: As the user starts typing the package type name in the Package Type field in Booking Wizard, the matching package type names will be displayed in auto-complete field and by selecting from this the rest of the package details will be populated automatically. 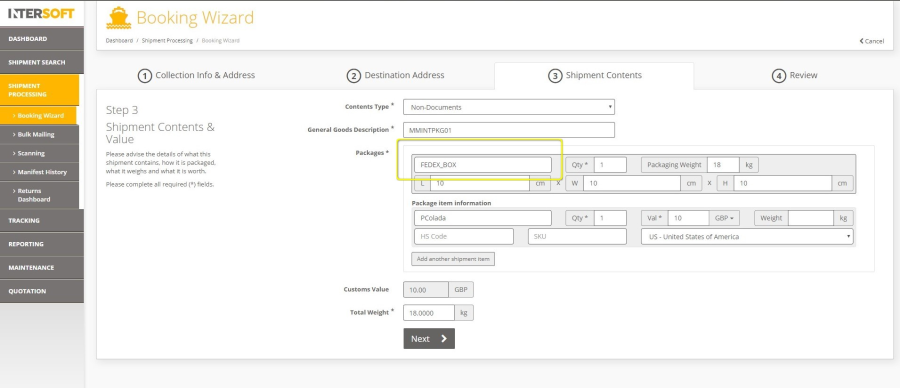
Figure 8: Booking Wizard – Shipment Contents Tab Screen
- Review Tab screen will open and displays all the shipment details entered.
- Customer user can review all the Shipment details and Select a service for the Shipment from Services list and confirm the booking.
- Shipment is created with Carrier Package Type and the label is generated. The package type name will be sent to the carrier to inform their shipping charge calculations.
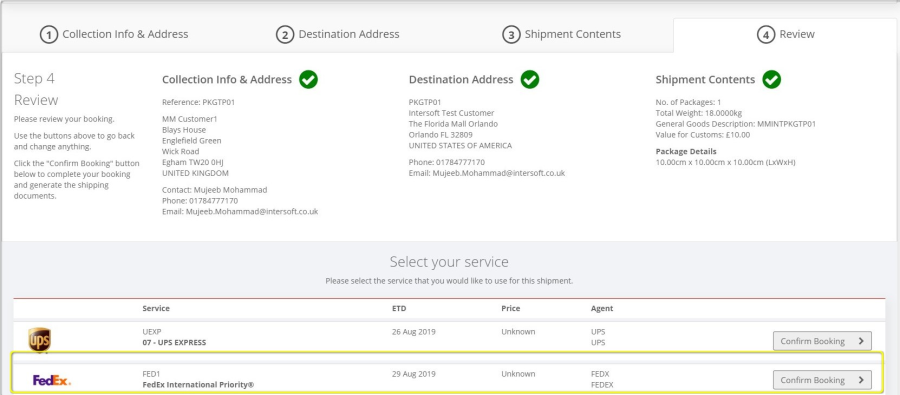
Figure 9: Booking Wizard – Review tab screen
Create a Shipment using Carrier Packaging via Bulk Mailing.
Create Bulk Mailing Template containing Package Type
To create a shipment using carrier packaging via Bulk Mailing, you will first need to ensure your Bulk Mailing Template is setup to include package type.
The Available Fields list in the Bulk Mailing Templates screen contains a Package Type Name field. This can be populated with a carrier package type name to use carrier packaging for a shipment.
You can add the package type name field into an existing Bulk Mailing Template or create a new template with the fields included. See the Manual "Create Shipments using Bulk Mailing V3.0" for full instructions on how to setup Bulk Mailing Templates and create a Bulk Mailing shipment.
NOTE: The Package Type Name entered in the file must exactly match the carrier's name for the package type you want to use. If the Package Type Name does not match the carrier's packaging name exactly then the carrier packaging will not be used, and this may result in carrier over-charges.
See the document "Intelligent Shipper Carrier Integrations and Features" for a list of the carrier package types that are supported in Intelligent Shipper. 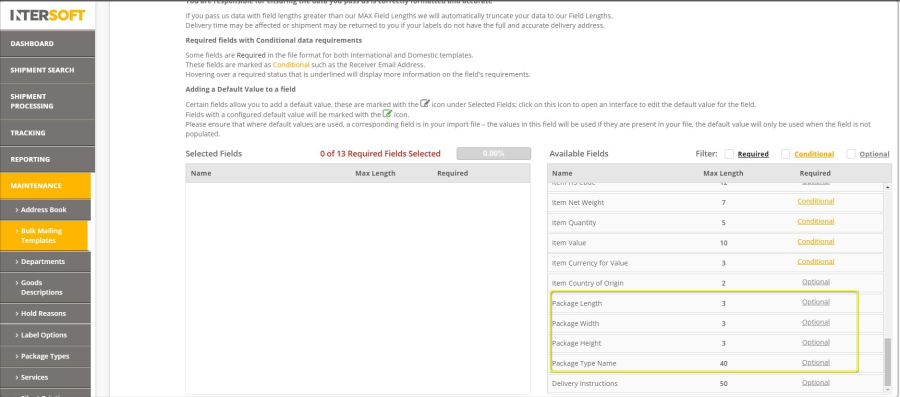
Figure 10: Add Bulk Mailing Template
Appendix 1 - Glossary
Term | Definition |
Customer User | The core users of the system who will be creating, processing and closing out shipments. This user role will be assigned to a customer account. |
Package Type Enhancement | Optional functionality offered by carriers for package type enhancements which allows the Customer User to select suitable packaging and best value shipping for both Domestic and International shipments. |