Setting Default Values in Bulk Mailing Templates Quick Reference Guide v2.0
|
Intelligent Shipper Quick Reference Guide – Setting Default Values in Bulk Mailing Templates
When creating a Bulk Mailing Template in Intelligent Shipper, it is possible to set default values for some fields. If a default value is set, then when a Bulk Mailing file is imported and the field is left blank in the file then Intelligent Shipper will automatically populate the shipment record with the default value set for the field. This allows you to set commonly used values as default values in the template, reducing the manual editing needed to prepare a Bulk Mailing template.
This guide instructs Customer role users how to set default values when creating Bulk Mailing Templates, so that these can be used when importing Bulk Mailing files. For full instructions on how to use the Bulk Mailing functionality, see the Bulk Upload Shipments Manual.
Create Bulk Mailing Template
To add a new Bulk Mailing Template, navigate to Maintenance > Bulk Mailing Templates and select the 'Add Template' button. 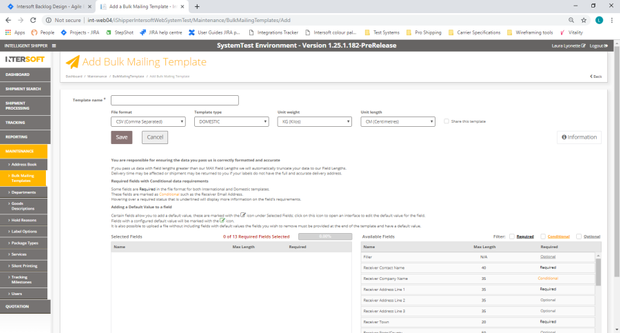
Complete the following steps to create the new template:
- Enter a template name. This is a required field.
- Specify the format of the file you will be uploading. Intelligent Shipper supports CSV (Comma Separated), PIPE Separated and ASCII fixed length file formats.
- Select the required template type, Domestic or International. The International template has some additional required fields that are needed for customs purposes.
NOTE: If you want to upload a file containing both domestic and international shipments then use the International template. All required fields will need to be populated for both domestic and international shipments.
- Select the required weight unit: KG(Kilos) or G(Grams).
- Select the required unit of length: CM(Centimetres) or MM(Millimetres).
- Select whether to share the template with other team members. If this box is ticked then the template will be available to all users for your customer account, if the box is unticked the template will only be available to yourself.
- Add fields to the template by clicking on the field in the Available Fields list. As fields are added to the template, they will be removed from the Available Fields list and added to the Selected Fields list.
- As fields are added to the template, they will be removed from the Available Fields list and added to the Selected Fields list.
- All Required fields must be selected. A progress bar indicates if all required fields have been selected. This bar must be at 100% before a template can be saved.
- If a Conditional field is selected, then it may require other fields to be added to the template. E.g. Item Description requires Item Value and Weight. In this case, if the relevant conditional fields are not selected then an error message will be displayed.
- Optional fields are truly optional, if they are not select there is no impact to template functionality
- Fillers can be used for any fields that will be given in the upload file but are not in the available field list. For e.g. "upload date" is not available in the available field list but if it will be used in the upload file then a "Filler" field can be used. The filler can also be used to pass blank values, so that you do not need to manually edit your upload file before uploading it.
- The order of the upload file must match the order of the template that has been saved i.e. if the shipper's reference is in the first column in the template then the same must be given as the first column in the upload file.
- Once all the necessary fields have been added to the Selected Fields list, click the 'Save' button to save the Bulk Mailing Template.
Add Default Values to Fields
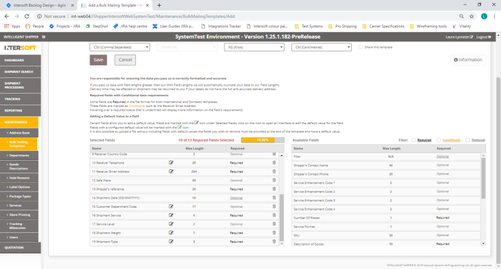
For fields where a default value can be set, an Edit icon is displayed in the Selected Fields list as shown in the image above. To add a default value to a field, complete the following steps:
- Click the Edit icon and a window will open as shown in the image below.
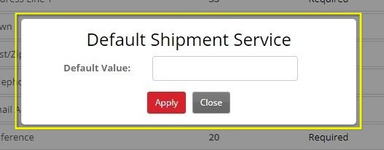
- Enter the default value required for the field and click Apply.
- The window will close and the default value will be saved.
- Repeat steps 1-3 for all fields you want to set a default value for.
Using Default Values in Bulk Mailing Files
When preparing a Bulk Mailing file for upload, if a field has a default value set then this can be left blank in the upload file, even if it is a required field. The column header must still be included in the file, else an error will be generated when you try and upload the file.
When the Bulk Mailing file is uploaded, if a field that has been left blank in the template has a default value set then the shipment record will be populated with this default value.
NOTE: If a required field does not have a default value set and is left blank in the Bulk Mailing file, then an error will be generated when the file is uploaded.
For instructions on how to upload Bulk Mailing files, see the Bulk Upload Shipments manual.