Silent Printing Manual v2.0
- Laura Lyonette (Unlicensed)
Commercial and in Confidence
The information contained in this document is confidential. No part of this document may be reproduced, disclosed to any third party, or issued in any form or by any means without the express written permission of Intersoft Systems & Programming Ltd.
Contents
Document Controls
Table of Figures
1. Introduction
1.1. Pre-requisites
2. Installing the Silent Print Application
1.2. Configure Silent Print Application
1.2.1. Reset Settings
3. Selecting Silent Print Profile in Intelligent Shipper
1.3. Edit Silent Print Profile
4. Switching from Test to Live Environment
4.1. Uninstalling the Silent Print Application
Appendix 1 – Quick Reference Guide
Table of Figures
Figure 1 - Download Silent Print Application Button
Figure 2 - Silent Print Download Window
Figure 3 - Windows Defender Message
Figure 4 - Run Silent Print Installation
Figure 5 - Silent Print Icon
Figure 6 - Silent Print Registration and Profiles Screen
Figure 7 - Silent Print Profile Successfully Registered Message
Figure 8 - Silent Print Settings and Printing Screen
Figure 9 - Reset Silent Print Settings
Figure 10 - Silent Printing Screen Select Profile Button
Figure 11 - Silent Print Profile Selected
Figure 12 - Edit Print Profile Button
Figure 13 - Edit Silent Print Profile
Figure 14 - Edit Silent Print Profile Fields Description
Figure 15 - Silent Print application in Uninstall or Change a Program list
Introduction
The Silent Printing functionality allows for the fully automated production of shipping labels and associated documents by printing to the necessary printers automatically when a shipment is created.
Pre-requisites
To run the Silent Print application successfully the below requirements will need to be met:
- PC running Windows 7 or above
- An x64-capable processor
- 20 megabytes (MB) of available hard disk space
- 2 GB or more of RAM.
- A monitor with a resolution of 1024 × 768 or higher
- Internet access (HTTPS port 443)
- Access to either a physical or network printer
To install the Intersoft Silent Print application you will need Administrator privileges on your PC.
Installing the Silent Print Application
- To install the Silent Print application, log into Intelligent Shipper and select Maintenance > Silent Printing > then click the "Download Silent Print Application" button.
Note: This button will only be displayed for Customer Administrator level users. 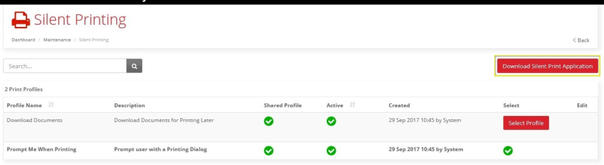
Figure 1 - Download Silent Print Application Button
- The Silent Print download window will be displayed. You will need to tick the "I agree to Intersoft Terms & Conditions" box to download the Silent Print application.
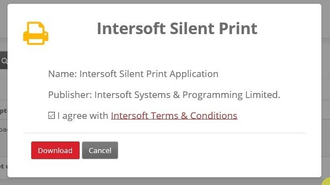
Figure 2 - Silent Print Download Window
- Windows may display a message regarding Windows Defender which has prevented the download. If this message is displayed, then you will need to select the "More Info" link to proceed.
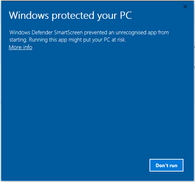
Figure 3 - Windows Defender Message
- Click "Run Anyway" to proceed with installing the Silent Print application. This will download the application and install it on your PC.
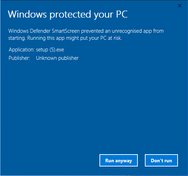
Figure 4 - Run Silent Print Installation
- Once the application has been downloaded a small icon will appear in the icon task bar and the Silent Print Registration and Profiles screen will open automatically.
![]()
Figure 5 - Silent Print Icon 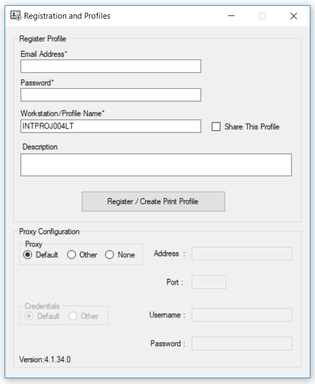
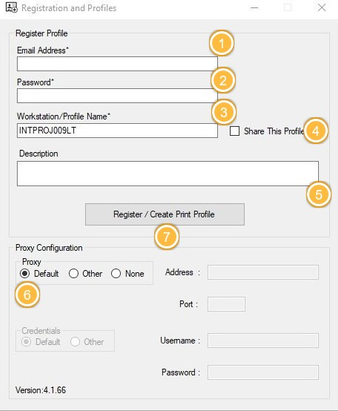
Figure 6 - Silent Print Registration and Profiles Screen
Configure Silent Print Application
Once the Silent Print application has been installed, you will then need to configure the application in the Registration and Profiles screen. This will create a Silent Print Profile that is then available for selection in the Intelligent Shipper application.
- In the Email Address field enter the email address that you use to login to Intelligent Shipper.
- In the Password field enter the password that you use to login to Intelligent Shipper.
- Workstation/Profile Name will be displayed in the Intelligent Shipper Silent Printing maintenance screen to identify the silent print profile. This will be populated with the name of your PC by default but can be changed to a name of your choice.
- Share This Profile makes the silent print profile available in Intelligent Shipper to all users under your customer account. If you want the silent print profile to be available to other users, then tick this box.
- Description allows you to enter a description for the profile. The description will be displayed in the Intelligent Shipper Silent Printing maintenance screen.
- Proxy Configuration allows you to set up proxy details. The Default option will be selected by default, you can change this and enter other proxy details if needed.
- Once all details have been completed then select "Register / Create Print Profile".
- A message will be displayed informing you the Silent Print profile has been successfully registered. Click "OK" on this message to proceed.
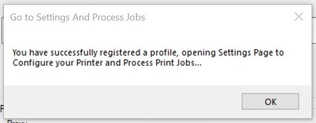
Figure 7 - Silent Print Profile Successfully Registered Message
- The Settings and Printing window will then open. To start the application looking for print jobs, select "Start Polling". The application will then start looking for print jobs and automatically print any labels and associated documentation that are generated.
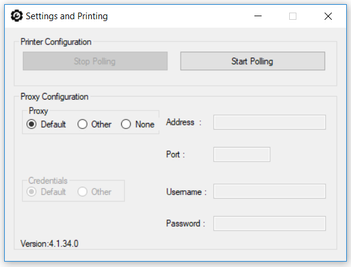
Figure 8 - Silent Print Settings and Printing Screen
Reset Settings
- Silent Print settings can be reset at any time by right-clicking on the silent print icon on the task bar and then selecting "Reset Settings".
Figure 9 - Reset Silent Print Settings
- A confirmation message will be displayed prompting you to confirm you want to reset settings.
- If you select Yes on this message, the Registration and Profiles screen will be cleared ready and you will be able create a new silent print profile.
Selecting Silent Print Profile in Intelligent Shipper
Once a Silent Print profile has been created, you can select it as your chosen print profile in Intelligent Shipper.
- To select the new Silent Print profile, log into Intelligent Shipper and navigate to Maintenance > Silent Printing.
- The profile you created in the previous section will be listed, and the Creation date will display the current date.
- If your Silent Print profile is not displayed in the print profiles list, then go back into the Silent Print application and stop and restart polling. This will refresh the printer profile list in the Silent Printing maintenance screen.
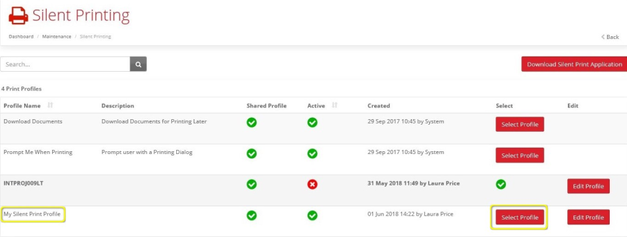
- To select the Silent Print profile as your chosen printing profile, click the "Select Profile" button.
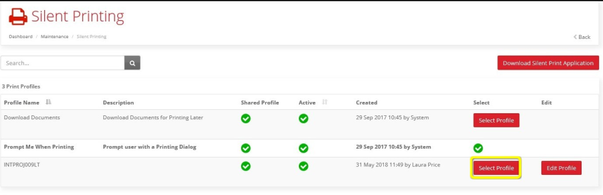
Figure 10 - Silent Printing Screen Select Profile Button
- The "Select Profile" button will then be replaced with a green tick to show that the profile has been selected as your chosen printing profile.
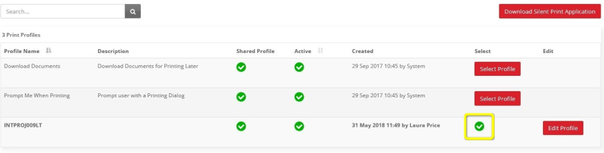
Figure 11 - Silent Print Profile Selected
Edit Silent Print Profile
You can update the printer selection or printer profile description for your Silent Print profile by editing the profile.
- To edit your Silent Print profile, in Intelligent Shipper navigate to Maintenance > Silent Printing then select "Edit Profile".
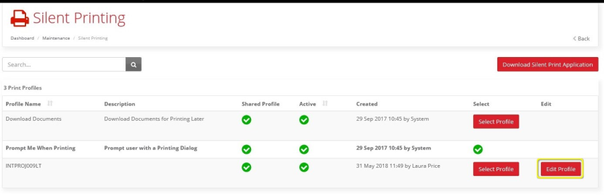
Figure 12 - Edit Print Profile Button
- The Edit Profile screen will open, containing the fields shown in figure 13 below.
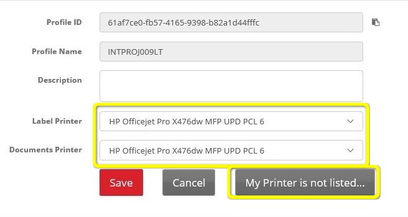
Figure 13 - Edit Silent Print Profile
Field name | Description |
|---|---|
Profile ID | Unique ID that will be assigned to a profile |
Profile Name | The Silent Print Application takes by default the user's computer name as profile name. This name can only be changed when Registering/Creating a Print Profile (Please refer to Silent Printing Configuration Manual). |
Description | This field is used to add a Description for a Silent Print Profile |
Label Printer | Printer that will be used to print labels with CN Documentation |
Document Printer | Printer that will be used to print Manifest |
Figure 14 - Edit Silent Print Profile Fields Description
- You can change the printers that are used for printing labels and documents by selecting any printer on your network from the drop-down lists in these fields and clicking "Save".
- If the printer you want to select is not included in the drop-down lists, then select the "My Printer is not listed" button for further instructions.
Switching from Test to Live Environment
When switching over from Intersoft's Test environment to the Live environment, you will need to uninstall any test versions of the Silent Print application that were installed during testing before downloading and installing the Live version.
Uninstalling the Silent Print Application
To uninstall the Silent Print application from your PC, complete the following steps:
- Access Control Panel on your PC
- Select Programs and Features > Uninstall or Change a Program
- Locate the 'Intersoft Silent Print' application from the list and uninstall the application
![]()
Figure 15 - Silent Print application in Uninstall or Change a Program list
- You will now need to remove the temporary files pertaining to Silent Print from your PC
- Access the App Data > Local folder on your PC via the following file path:
C:\UsersUser Name\AppData\Local
NOTE: You can also find the App Data folder by searching for %appdata% in file explorer, which will take you to the AppData > Roaming folder, you can then backtrack to the AppData folder and will see Local: 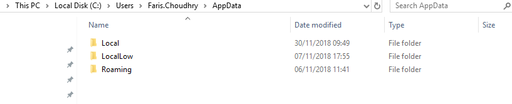
- Within the Local folder, delete the following folder:
- Intersoft_Systems_&_Progr > IntersoftSilentPrint.exe_URL…
You have now removed the Silent Print application from your PC. Silent Print can be downloaded from your Live system and installed again for use with the Live environment.
Appendix 1 – Quick Reference Guide
In Intelligent Shipper navigate to Maintenance > Silent Printing and select "Download Silent Print Application". Once the application is downloaded the Registration and Profiles screen will open automatically.
To create a Silent Print Profile, complete the following steps:
- Enter the email address you use to login to Intelligent Shipper.
- Enter the password you use to login to Intelligent Shipper.
- Enter a profile name for the Silent Print Profile (this will be displayed in the Intelligent Shipper Silent Printing screen). The field will be populated with the name of your PC by default, and you can change this to name of your choice.
- Tick the "Share This Profile" box to make the profile available to other users.
- Enter a description for the Silent Print Profile (this will be displayed in the Intelligent Shipper Silent Printing screen).
- Select the required proxy configuration. The "Default" option will be selected automatically and can be changed if needed.
- Once values have been entered in all fields select "Register / Create Print Profile". Your Silent Print Profile will be created and available for selection in the Intelligent Shipper Silent Printing screen.
Clicking "Select Profile" will set the Silent Print profile as your chosen print profile in Intelligent Shipper.