Manifest Monitor Manual V1.0
- Laura Lyonette (Unlicensed)
Commercial and in Confidence
The information contained in this document is confidential. No part of this document may be reproduced, disclosed to any third party, or issued in any form or by any means without the express written permission of Intersoft Systems & Programming Ltd.
Contents
1 Document Controls
2 Table of Figures
3 Introduction
4 Manifest Monitor Screen
4.1.1 Manifest Monitor Screen Layout
4.1.2 Manifest Monitor – Refresh
4.1.3 Manifest Monitor – View Shipments Detail
4.1.4 Close Out Shipments
5 Appendix 1 – Glossary
6 Appendix 2 – Setting Up Transfer Type for Customers
7 Appendix 3 – Common Errors
Table of Figures
Figure 1: Display of Manifest Monitor Screen via Dashboard
Figure 2: System Areas in Manifest Monitor Screen
Figure 3: Automatic Refresh in Manifest Monitor Screen
Figure 4: Turn Off Automatic Refresh in Manifest Monitor Screen
Figure 5: Manual Refresh in Manifest Monitor Screen
Figure 6: View Option in Manifest Monitor via Detail View
Figure 7: View Shipments of the Selected Carrier in Manifest Monitor
Figure 8: View Option in Manifest Monitor via Basic View
Figure 9: View Shipments of the Selected Carrier in Manifest Monitor
Figure 10: Select Shipments to Close Out via Manifest Monitor Shipments Screen
Figure 11: Closeout Button to Close out the Selected Shipments
Figure 12: Confirmation Required Screen to Closeout
Figure 13: Closeout in Process
Figure 14: Manifest Created Confirmation Screen
Figure 15: Back Button in Manifest Monitor Closeout Screen
Figure 16: Royal Mail Shipments Closeout Screen
Figure 17: Closing Out Royal Mail Shipments by Posting Location
Figure 18: Transfer to Invoice Option in Customer Setup
Figure 19: Transfer to Operations Option in Customer Setup
Figure 20: Example Time Out Error in Manifest Monitor
Figure 21: Example Common Error
Introduction
The Intelligent Shipper Manifest Monitor functionality enables System Administrators to monitor the shipments of their Customers, and close out when needed. This functionality eliminates the need of navigating to individual Customer account and close out shipments. Manifest Monitor also gives an opportunity to close out multiple Customers' shipments at the same time and increases the visibility of the Customer's shipments by presenting in a summarised way.
Manifest Monitor Screen
- To access Manifest Monitor screen, you must first login to Intelligent Shipper system and click "Manifest Monitor" from the left pane menu.
- A screen named "Manifest Monitor" will now be displayed. Please note that this option is available for System Administrators only.
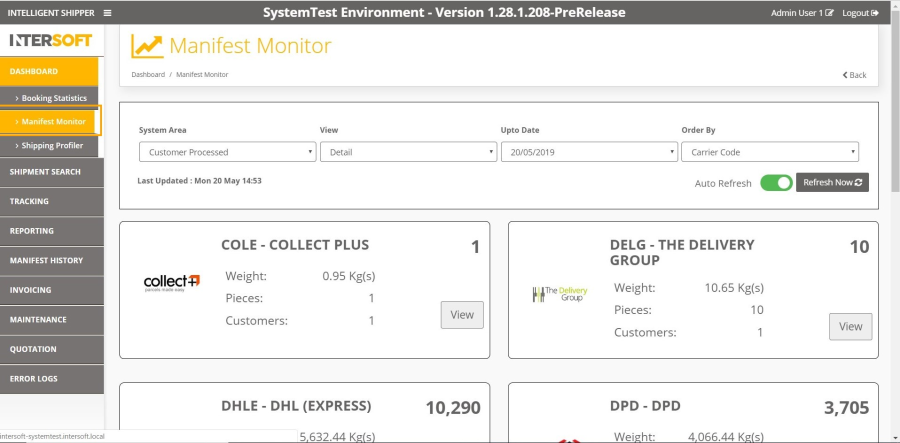
Figure 1: Display of Manifest Monitor Screen via Dashboard
Manifest Monitor Screen Layout
This section explains about the layout of Manifest Monitoring Screen and its various options that are available for viewing shipments. 
Figure 2: System Areas in Manifest Monitor Screen
Manifest Monitor - System Area
- The following System Areas are available in the Manifest Monitor Screen. Refer to Appendix to know more about System Area Appendix 1
- Customer Processed
- Customer Unprocessed
- Operations Processed
- Operation Unprocessed
- All Areas
- When the Manifest Monitor Screen is loaded initially, the system area will be defaulted to "Customer Processed" and the customer processed shipments of each carrier will be displayed.
- You can modify the system area by selecting a different option from its drop-down menu.
- The refreshed screen will display the details of the selected system area.
- If there are no results of the selected system area, then a screen with empty results will be displayed.
Manifest Monitor - View
- The Manifest Monitor screen can either be viewed in a summarised way or in a detailed way. There are two view types available and they are
- Basic View
- Detail View
- To view the shipments in detail, use the drop-down under the view option and click "Detail".
- A list of shipments will now be displayed in a detailed way.
- The detailed view will have the following for each Carrier
- Carrier Code
- Carrier Name & Logo
- Weight
- Total Number of Pieces
- Number of Customers
- Similarly, to view the shipments in Basic view, use the drop-down under the view option and click "Basic".
- A list of shipments will now be displayed in a summarised way.
- The basic view will have the following for each Carrier
- Carrier Code
- Carrier Name & Logo
- Total Number of Pieces
Manifest Monitor – Upto Date
- An upto date option is available in the Manifest Monitor which allows you to update the shipment results according to the date selected.
- To view the shipments up to a specific date, click the "Upto Date" drop-down menu.
- Select a specific date from the drop-down. Upto date will display last 7 days date including today.
- You will now see the refreshed results upto the date you have selected of the selected system area. E.g. if the Upto date is selected as yesterday, then the shipments that are open until yesterday will be displayed.
Manifest Monitor – Order By
- The following order by options are available in the Manifest Monitor Screen and explains how the shipments are arranged when each option is selected.
- Carrier Code
- Shipments are arranged by carrier code in an alphabetical order. By default, the shipments will be ordered by carrier code when manifest monitor screen is loaded.
- Customer Count
- Shipments are arranged by the number of Customers that each carrier have in a descending order. When the carriers have the same number of customers then it will be arranged alphabetically according to the carrier name.
- Shipments
- Shipments are arranged by the total number of shipments of each Carrier in a descending order.
- Weight
- Shipments are ordered by the total weight of shipments of each Carrier in a descending order - the highest weight will be displayed first.
- To use the order by option in the Manifest Monitor, you must first click the order by drop-down menu.
- Select the required option from the displayed list e.g. Customer Count.
- You will now see the manifest monitor results are arranged as per the selection.
Manifest Monitor – Refresh
Manifest Monitor screen can be refreshed either automatically or manually to display the latest shipment details.
- To refresh the manifest screen automatically, click the toggle button to "on". This will turn on the automatic refresh and the screen will now be refreshed every 2 minutes.
- By default, the manifest monitor screen will be set to refresh automatically.
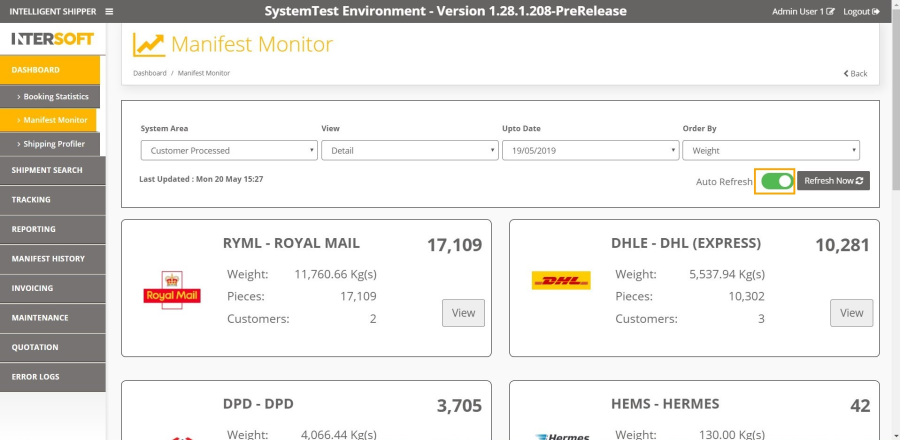
Figure 3: Automatic Refresh in Manifest Monitor Screen
- To set a manual refresh of shipments, click the toggle button to "off" mode.

Figure 4: Turn Off Automatic Refresh in Manifest Monitor Screen
- Now to refresh manifest monitor screen manually, click "Refresh Now" button.
- The latest shipments by carrier of the selected system area will be displayed.
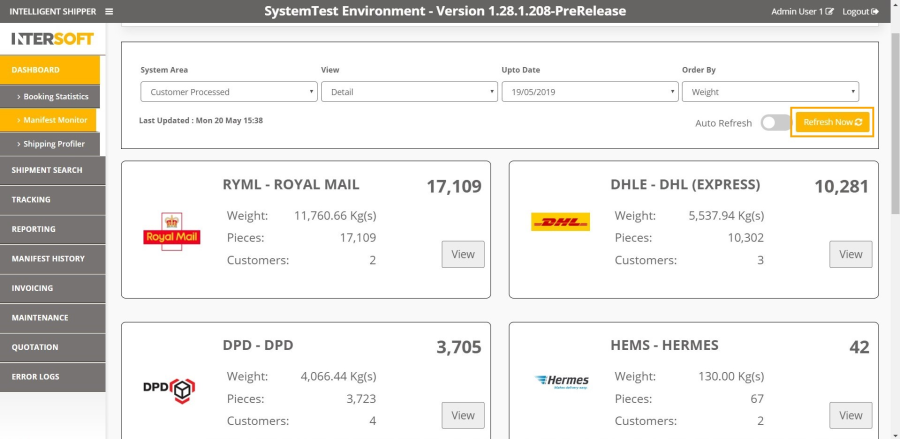
Figure 5: Manual Refresh in Manifest Monitor Screen
Manifest Monitor – View Shipments Detail
Manifest Monitor allows you to view shipments in detail and close out shipments either through detail view or basic view.
- To navigate to a shipment detail screen from a detail view of the manifest monitor, click the "View" button of the required carrier.
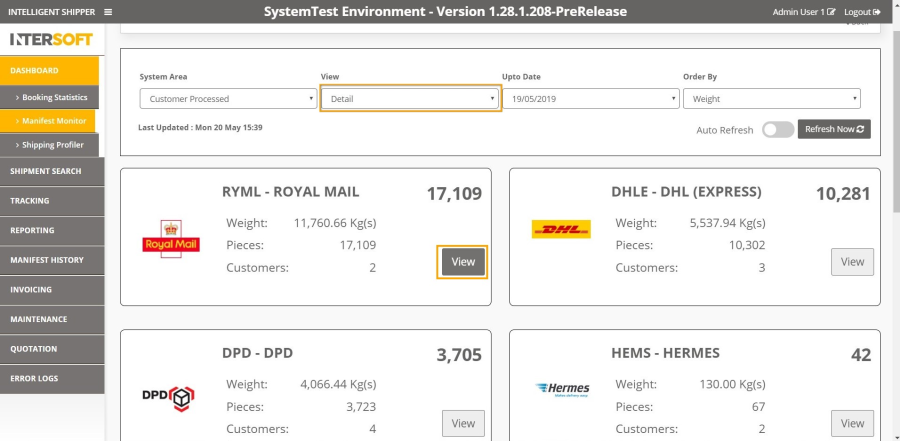
Figure 6: View Option in Manifest Monitor via Detail View
- A shipment detail screen of the selected carrier will now be displayed.
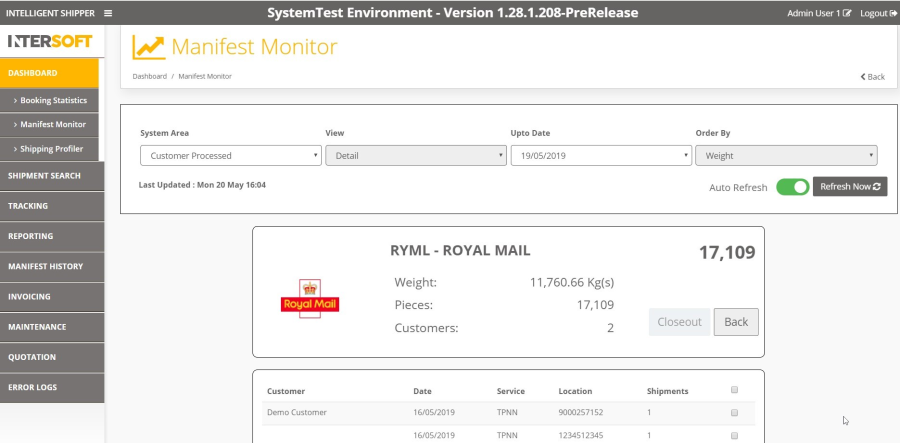
Figure 7: View Shipments of the Selected Carrier in Manifest Monitor
- To navigate to a shipment detail screen from a basic view of the manifest monitor, click the "View" button of the required carrier.
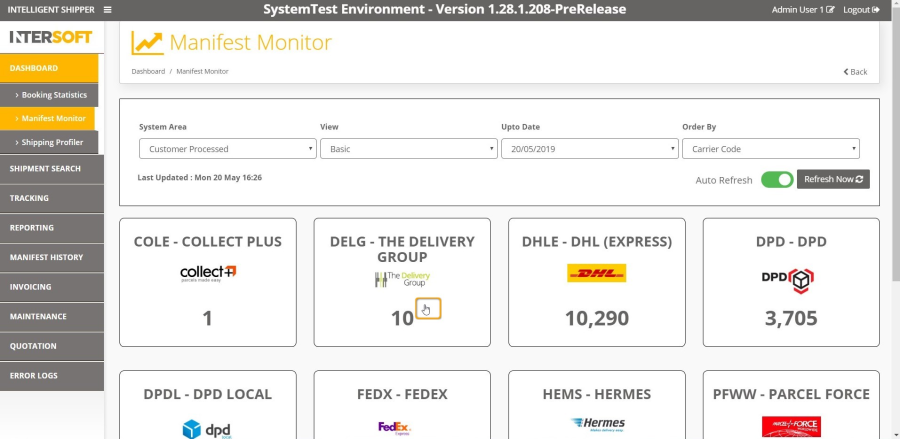
Figure 8: View Option in Manifest Monitor via Basic View
4. A shipment detail screen of the selected carrier will now be displayed. 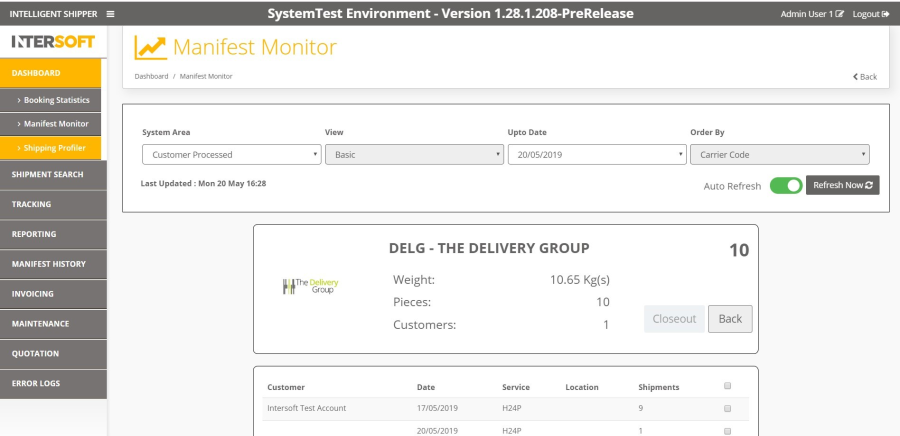
Figure 9: View Shipments of the Selected Carrier in Manifest Monitor
Close Out Shipments
Manifest monitor screen allows you to close out shipments by Customer account and by posting location for Royal Mail shipments.
- To close out shipments, you must first navigate to the shipment detail screen using the detail or basic view as described in section 4.1.3
- Select the shipments by clicking the related check box.
- You can also select all shipments by clicking the check box that is in header (Next to the text "Shipments")
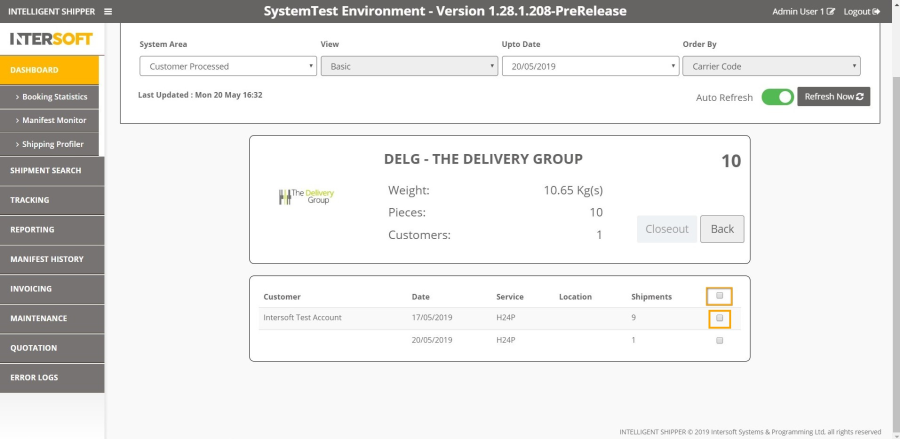
Figure 10: Select Shipments to Close Out via Manifest Monitor Shipments Screen
- Click "Close Out" to closeout the shipments that are selected. Shipments that are not in a processed (customer processed or operations processed) state can still be viewed but will not be available to close out.
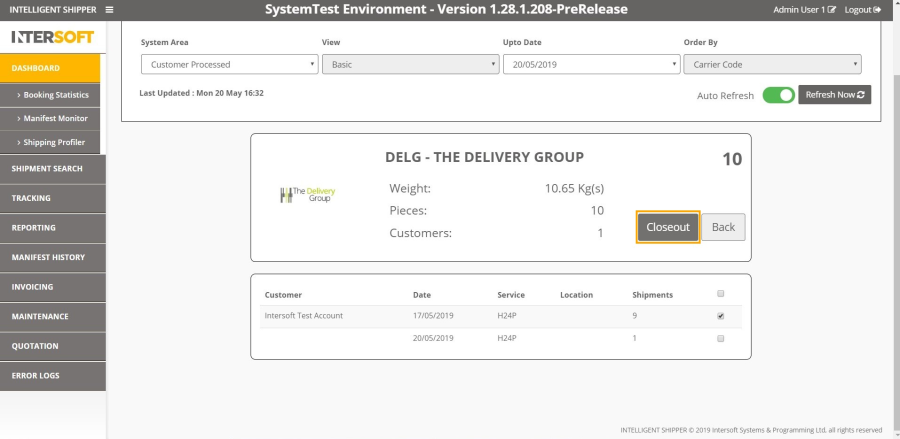
Figure 11: Closeout Button to Close out the Selected Shipments
- A confirmation required screen will appear with "Yes" or "No". When "Yes" is selected, the shipments will be closed out and when "No" is selected the closeout action will be cancelled.
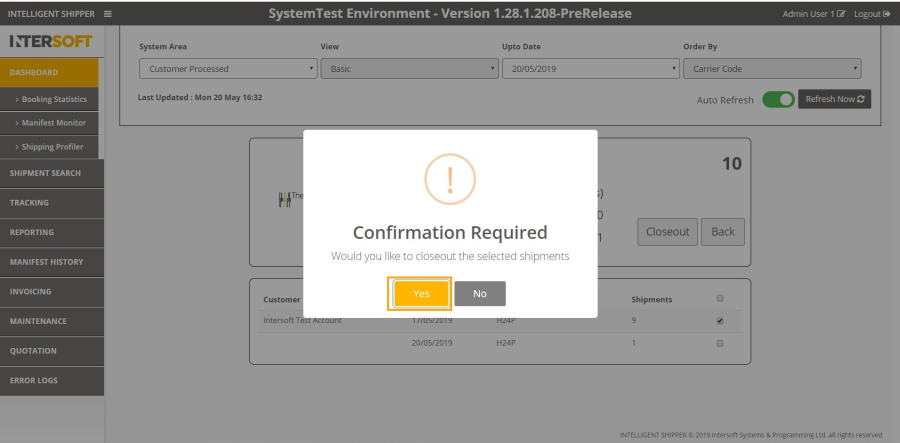
Figure 12: Confirmation Required Screen to Closeout
- Click "Yes" and a closeout in process will appear. You need to wait until a confirmation message is displayed.
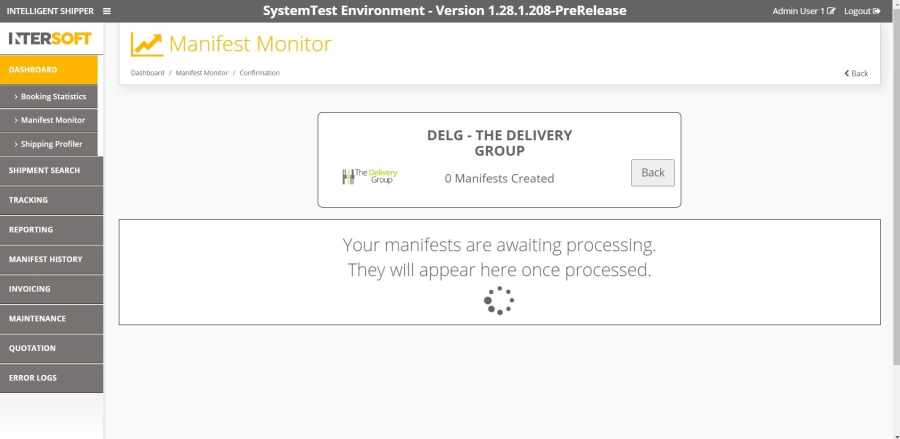
Figure 13: Closeout in Process
- A manifest created screen will now be displayed, and it will list the number of manifests created. You can also view or print the manifest by clicking the link that is displayed under the Manifest column.
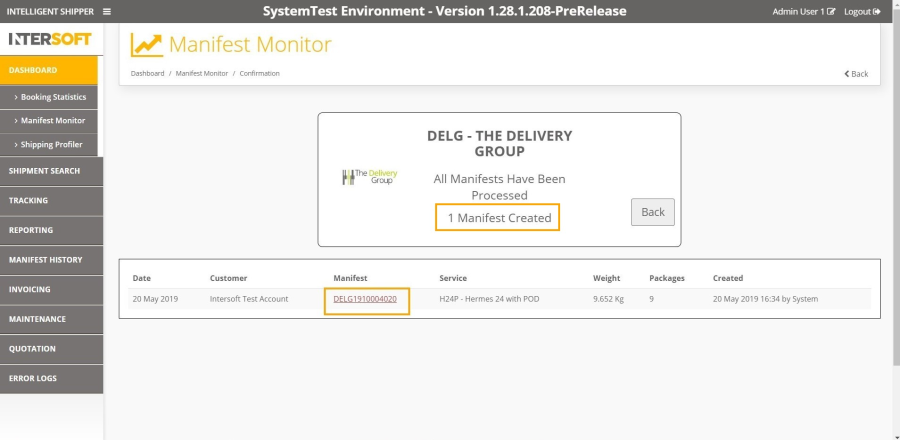
Figure 14: Manifest Created Confirmation Screen
- Click on the "Back" button to navigate to previous screen and to close out more shipments.
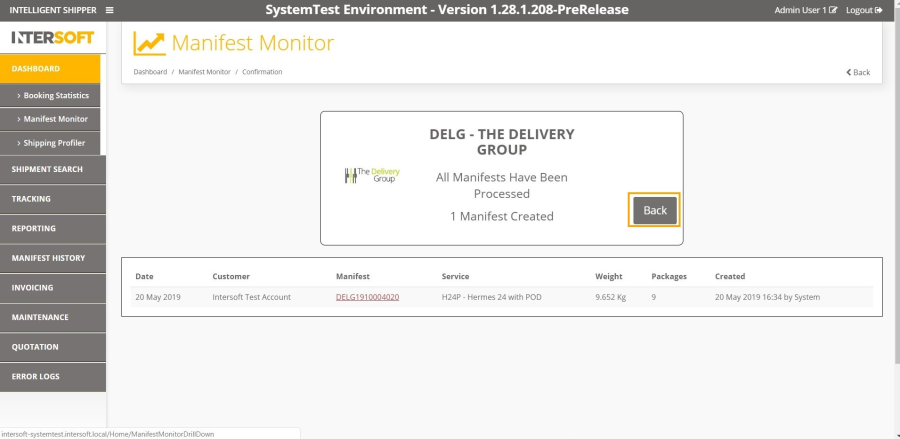
Figure 15: Back Button in Manifest Monitor Closeout Screen
- To close out by posting location for Royal Mail shipments, click on any Royal Mail shipments either through basic or detailed view as described in section 4.1.6
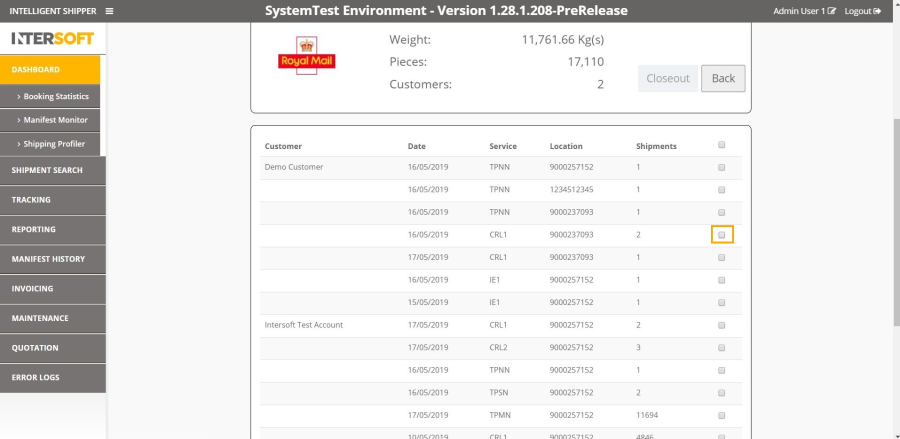
Figure 16: Royal Mail Shipments Closeout Screen
- Select the posting location of Royal Mail shipments and click "Closeout". It then follows the same process as normal close out.
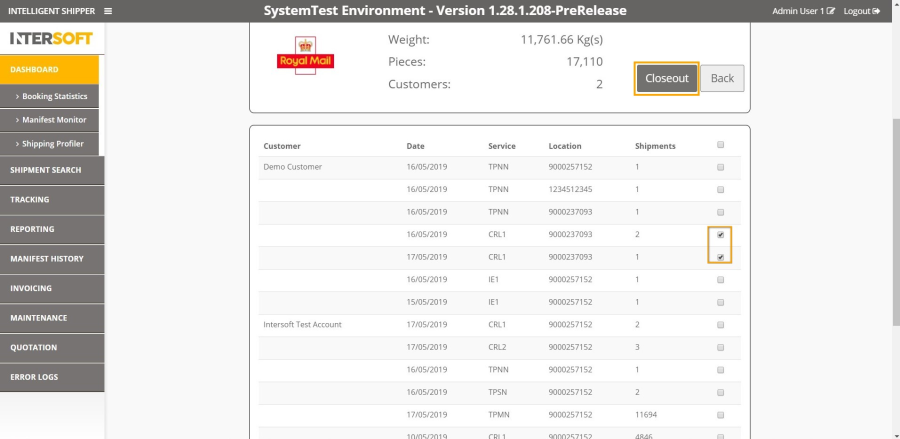
Figure 17: Closing Out Royal Mail Shipments by Posting Location
Appendix 1 – Glossary
Term | Definition |
Customer Processed | Customers with transfer type set as "Transfer to Invoice" whose shipments have been created in a processed state that will have the label available and are ready to be closed out. |
Customer Unprocessed | Customers with transfer type set as "Transfer to Invoice" whose shipments have been created in an unprocessed state and a label will not be available. The shipment will need to be scanned to generate the label and move to a processed state so that it can be closed out. |
Operations Processed | Customers with transfer type set as "Transfer to Operations". whose shipments have been created in a processed state that will have the label available and are ready to be closed out. |
Operations Unprocessed | Customers with transfer type set as "Transfer to Operations" whose shipments have been created in an unprocessed state and a label will not be available. The shipment will need to be scanned by operations to generate the label and move to a processed state so that it can be closed out. |
Transfer to Invoice | Customers can be set up with this option if shipments are processed and collected by the courier for transfer. |
Transfer to Operations | Customers can be set up with this option if shipments are taken to a depot and sorted for shipping before being processed, e.g. if all shipments are collected then sorted into Domestic and International before being processed and collected for transfer. |
Appendix 2 – Setting Up Transfer Type for Customers
This section explains about to setting up transfer for each Customers.
The shipments will be classified as Customer Unprocessed or Customer Processed if the transfer type is set as "Transfer to Invoice" in the Customer account setup. 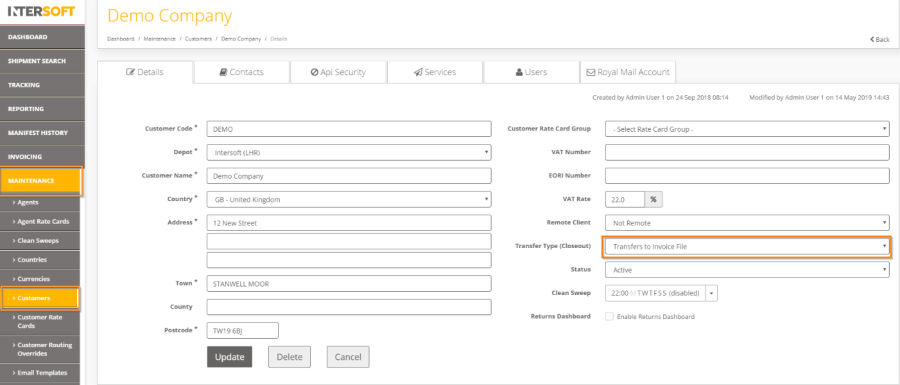
Figure 18: Transfer to Invoice Option in Customer Setup
In the same way, the shipments will be classified as Operations Processed or Operations Unprocessed if the transfer type is set as "Transfer to Operations" in the Customer account setup.
Refer to Appendix 1 to know more about transfer types. 
Figure 19: Transfer to Operations Option in Customer Setup
Appendix 3 – Common Errors
This section explains the most common error that can occur within Manifest Monitor.
A time out error could occur when shipments greater than a count of 5000 are closed at a time. An error will be created like the one below. The shipments would still have been manifested even though an error has occurred. 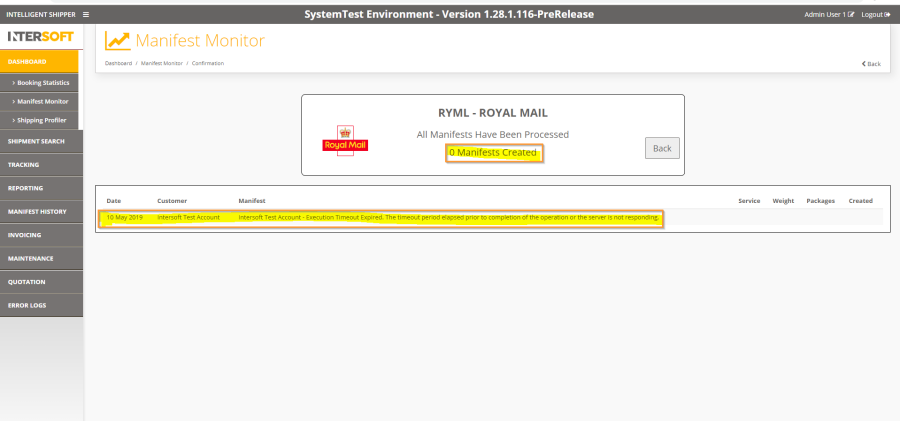
Figure 20: Example Time Out Error in Manifest Monitor
Another common error that could occur for any reason is "An error has occurred" message. If this happens, then contact techsupport@intersoft.co.uk for assistance.
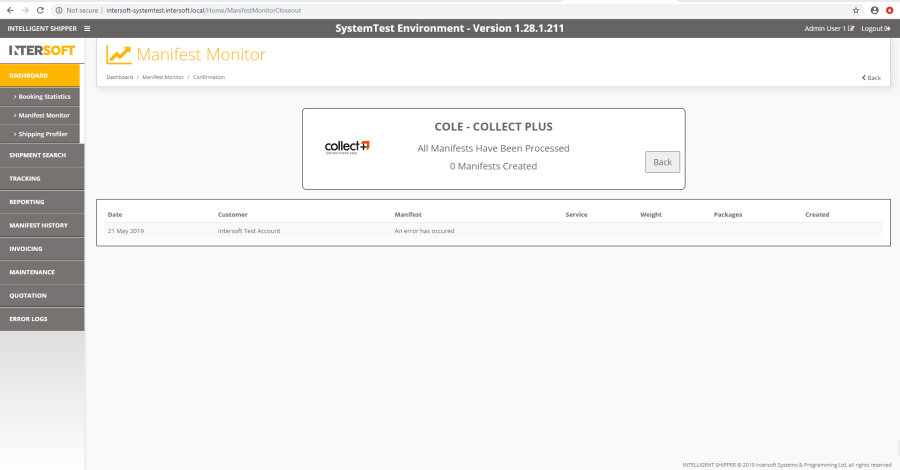
Figure 21: Example Common Error