Tracking Milestones Administrator Configuration v2.0
Commercial and in Confidence
The information contained in this document is confidential. No part of this document may be reproduced, disclosed to any third party, or issued in any form or by any means without the express written permission of Intersoft Systems & Programming Ltd.
Contents
Document Controls
2. Table of Figures
3. Introduction
4. Creating and Configuring Tracking Milestones
5. Cloning Milestones
Table of Figures
Figure 1 - Tracking Milestones
Figure 2- Tracking Maintenance Alternative Flow
Figure 3 - Tracking Milestones Page
Figure 4 - Adding A Milestone
Figure 5 - Trigger Email
Figure 6 - Customising Milestones
Figure 7 - Tracking Milestones Overview
Figure 8 - Customer Account Selection
Figure 9 - Milestone Cloning
Introduction
The ability to select and apply Tracking Milestones supports the Tracking and Reporting functions within the Intelligent Shipper system. This aims to enhance the customer shipment recipient delivery experience by displaying tailored tracking landmarks and the inclusion of trigger events that will be communicated with customers recipient once a Tracking Milestones has been hit.
Intelligent Shipper contains the functionality to enable System Administrators to set up default tracking milestones for their customers. Once established, the default tracking milestones will be displayed to customers who can choose to retain the default Milestones or edit them if required, this is detailed in Section 4 of this User Guide. Administrators also have the ability to clone and edit selected Milestones onto a chosen customer account and this function is detailed in Section 5. The instructions for setting up email notification and tracking templates is covered in the 'Tracking Milestones' user guide.
Creating and Configuring Tracking Milestones
The Intelligent Shipper Tracking Milestones function is fully customisable to System Administrators, providing the ability to construct the default milestones provided to customers.
To initiate the milestone selection follow the steps below:
- Click on the maintenance > Tracking Milestones on the left panel in order to access the Tracking Milestones screen:
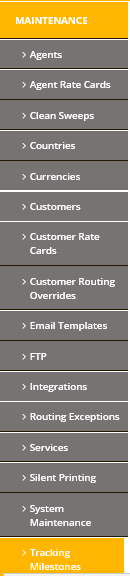
Figure 1 - Tracking Milestones
- Alternatively, click on 'Maintenance' to display the Tracking Milestones sub-menu (Figure 2).
- Click on 'View / Edit' button to access the 'Tracking Milestones' page (Figure 2).
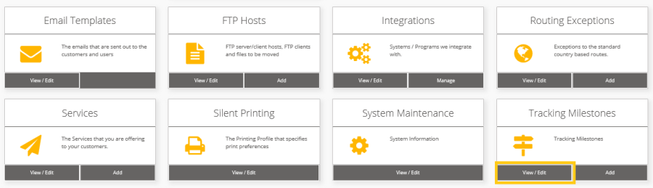
Figure 2- Tracking Maintenance Alternative Flow
- In order to add a new Milestone click on the 'Add New Milestone' button (Figure 3). As many Milestones can be added as required.

Figure 3 - Tracking Milestones Page
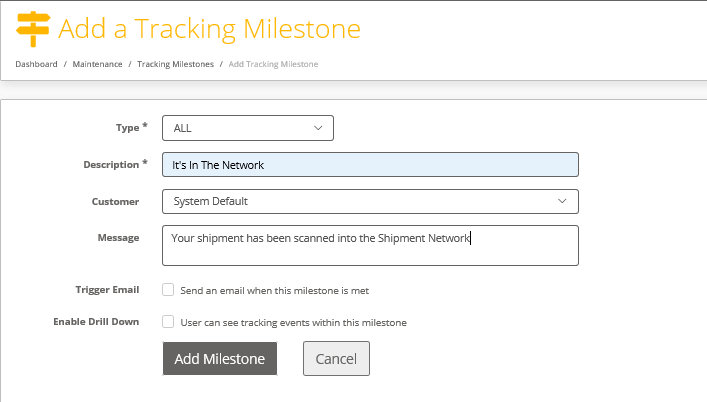
Figure 4 - Adding A Milestone
- Select the Milestone Type from the list below:
- Delivery Milestone – Milestone is applicable to outbound shipments solely
- Return Milestone – Milestone is applicable to return shipments solely
- All – Milestones will be applicable to both outbound and return shipments
- The corresponding Milestones Type will then be displayed on the Tracking Milestone Overview page as per Figure 7.
- Input the Milestone name in the 'Description' field i.e. 'It's In The Network' which will be displayed on the tracking Milestones page.
- Providing multiple customers are held, open the 'Customer' dropdown menu to select a customer to apply the Milestone to, alternatively select System Default if you want to set the milestone as a default milestone that can be copied to customer accounts.
- Further details about the milestone can be added in the message field, once added the message will pull through to the customer email if the Trigger Email function is selected and be displayed on the tracking page along with the milestone description.
- If selected, the 'Trigger Email' button will send an email to the customer when the Milestone is met (Figure 5), please see the Tracking Milestones User Guide for further detail.
- If selected, the 'Enable Drill Down' button will allow end consumer to see tracking events allocated to this milestone.
- If a customer has been added to the returns dashboard, this field will set the 'Background Colour' that will be used on the returns dashboard, click on the Background Line icon to edit the hue, saturation and lightness, the edit screen that then loads will be different across the various internet browsers. To find out more about the returns dashboard or to request this for your customers please contact Intersoft on info@intersoft.co.uk.
- If a customer has been added to the returns dashboard, this field will set the 'Text colour' that will be used on the returns dashboard, click on the Text Line icon to edit the hue, saturation and lightness, the edit screen that then loads will be different across the various internet browsers. To find out more about the returns dashboard or to request this for your customers please contact Intersoft on info@intersoft.co.uk.
- Click on the 'Add Milestone' button to add this milestone and to progress to the 'Customise Tracking Milestone' (Figure 6).
- Click on the 'Cancel' button to return to the 'Tracking Milestones' page.
Figure 5 - Trigger Email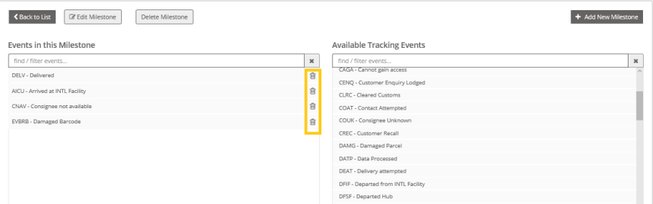
Figure 6 - Customising Milestones
- Click on a Tracking event from the 'Available Tracking Events' field to add it to the 'Events In This Milestone'.
- Click on a 'Dustbin' icon to delete a Tracking Event from the 'Events In This Milestone' field.
- More than one Tracking Event can be mapped to a 'Tracking Milestone'.
- Any 'Tracking Events' which are not mapped will remain in the 'Available Tracking Events' section and can be added at a later date if required.
- Click on the 'Edit Milestone' button to return to the 'Adding Milestone' tab (Figure 4).
- Click on the 'Delete Milestone' button to delete the Milestone.
- Click on the 'Back To List' or 'Back' button to save your changes and return to the Tracking Milestone page (Figure 3).
- The Tracking Milestone page then provides an overview of the added Tracking Milestones, a Tracking Milestones search bar, the ability to Clone Milestones and the ability to add further New Milestones.
- The order of the Milestones can be edited by selecting the 'Up' or 'Down' arrows in order to move the Milestone in the corresponding order.
- Select the Milestone Service to view configured Delivery, Return or All Milestones types (Figure 7)
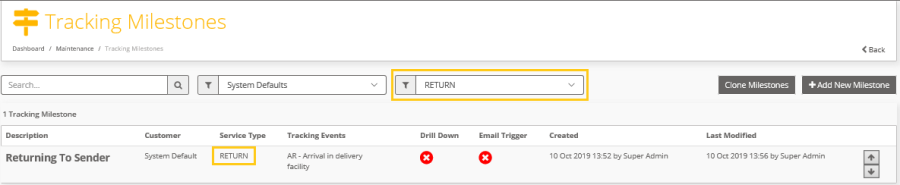
Figure 7 - Tracking Milestones Overview
Cloning Milestones
Cloning milestones allows the copying of the default system milestones to a customer account or copying milestones from one customer account to another. Users of that customer account can then select to override the milestones if needed.
- From the 'Tracking Milestone' screen select a customer or System Defaults via the 'Drop Down' menu in order to view the Tracking Milestones that are currently configured to this customer (Figure 8).

Figure 8 - Customer Account Selection
- Once a customer account has been selected, further Milestones can be added or edited as per section 4.
- Click on the 'Clone Milestones' button in order to launch the 'Clone Milestones' modal (Figure 9).
- From the 'Clone This Customers Milestones' drop-down menu, select a customer that you wish you to clone milestones from.
- From the 'To This Customer' drop-down menu, select the customer to receive the imported Milestones. All customers who currently have the Default Milestones applied will be selectable to receive the new Milestones.
- Select 'Clone Milestones' button to confirm the Milestone import. The milestones will then be cloned to the selected account .
- Select the 'Cancel' button to return to the Tracking Milestones page.
- Tracking Milestones can be cloned to one customer at a time, if you required adding the 'System Defaults' Milestones to all customers, this must be done individually.
- In the event changes are made to the initial Tracking Milestones, these changes will not be automatically updated for customers who have had cloned Tracking Milestones applied to their account. In order to apply the updated Tracking Milestones the customers must have their initial Tracking Milestones removed and then cloned with the updated version for the most recent Tracking Milestones to be applied.
- Once the Milestones have been successfully cloned to a customer's account, if required they can then be edited.

Figure 9 - Milestone Cloning