Scanning Location Setup Manual v1.0
Commercial and in Confidence
The information contained in this document is confidential. No part of this document may be reproduced, disclosed to any third party, or issued in any form or by any means without the express written permission of Intersoft Systems & Programming Ltd.
Contents
1 Document Controls
2 Table of Figures
3 Introduction
4 Maintain Scanning Locations
4.1 Add a Scanning a Location
4.2 Update Scanning Location
4.3 Delete a Scanning Location
4.4 Set Location
5 Bulk Upload Scanning Locations
6 Scanning Location PIN
6.1 Change Scanning Location
7 Error Handling
7.1 Bulk Upload Scanning Location Errors
Table of Figures
Figure 1: Add Scanning Location
Figure 2: Add Scanning Location – Field name, description
Figure 3: Scanning Location List
Figure 4: Edit Scanning Location Screen
Figure 5: Delete Scanning Location
Figure 6: Delete Scanning Location -Confirmation Message
Figure 7: Set Scanning Location Screen
Figure 8 Set Scanning Location Confirmation Message
Figure 9: Scanning Location - Bulk Upload Scanning Locations
Figure 10: Bulk Upload Scanning Location
Figure 11: Bulk Upload Scanning Locations – File Upload
Figure 12: Set a 4-6-digit number PIN
Figure 13: Set a 4-6-digit number PIN
Figure 14: Change scanning location PIN
Figure 15: Change scanning location PIN
Figure 16: Error Message when PIN is less or greater than 4-6 digits
Figure 17: Error Message when Incorrect PIN in entered
Figure 18: Error message when the New PIN entered does not match the Confirm PIN
Figure 19: Error when file format is not .csv
Figure 20: Error – Duplicate records in the file uploaded
Figure 21: Error – File Validation failed
Introduction
Scanning Locations is a feature on the Intelligent Shipper Maintenance menu, that allows system Admin users to create, set and update a scanning location and a Scanning Location PIN.
This Screen is only displayed when DC Scanning functionality is enabled for the system. Once the scanning location is set, it will be saved on the Shipment record and will be used with the Print Label Webhook (if enabled), which can be used to automatically print labels from the Till Pack and DC Scanning screens.
This manual describes the steps to create, update and delete scanning locations and to set and update a scanning location PIN.
Maintain Scanning Locations
To Add a scanning location, follow the steps below:
- Click on 'Maintenance on the left pane menu
- Click on 'Scanning Locations'
- The Scanning Location screen allows the user to:
- Change Scanning Location PIN
- Bulk Upload Scanning Locations
- Add Scanning location
Add a Scanning a Location
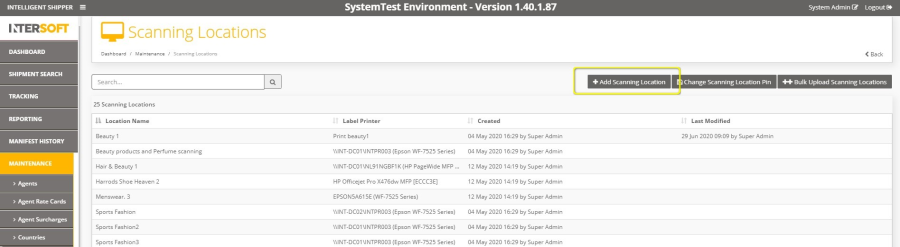
Figure 1: Add Scanning Location
The following fields are displayed on the Add Scanning Location screen
- Location Name – This is the Scanning Location for the Station the packages are scanned.
- Label Printer – This is the name of the printer where the labels are printed if the Print Label webhook is used.
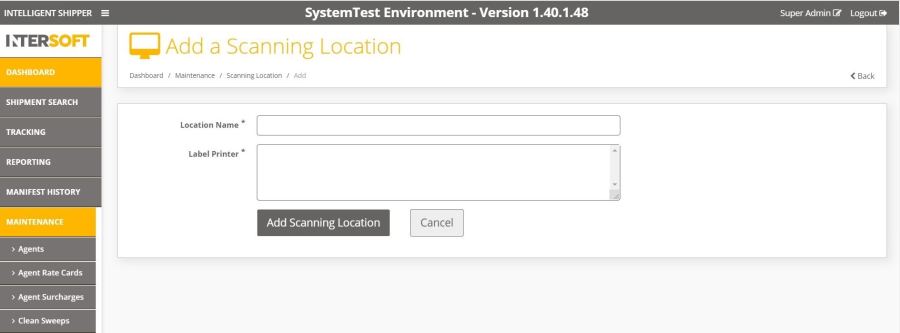
Figure 2: Add Scanning Location – Field name, description
Note: Mandatory fields are marked with an asterisk; The information entered in the Location Name & Label Printer will later be displayed during Till Scanning & DC Scanning Process.
- Enter the relevant Scanning Location details as required in the Location Name and the Label Printer field and Select Add Scanning Location.
- User is directed to the List of Scanning Locations with the below screen columns
- Location Name
- Label Printer
- Created
- Last Modified
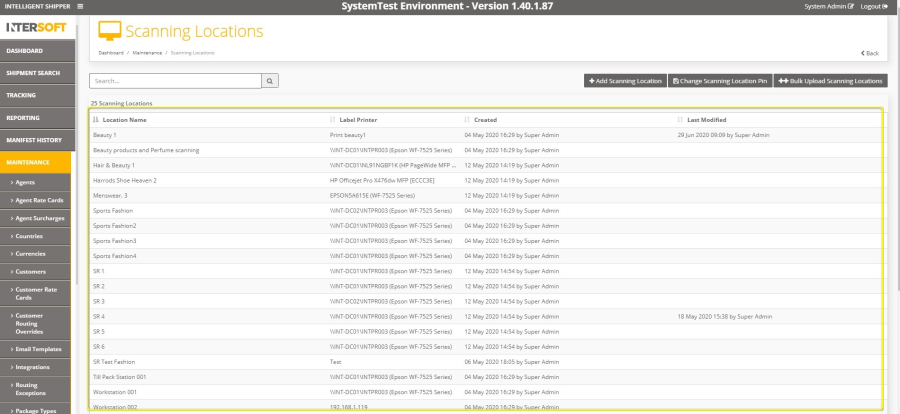
Figure 3: Scanning Location List
Update Scanning Location
- Click on a location Name on the Scanning Location List
- Edit Scanning Location Page is displayed.
- Location Name is field is disabled; only the Label Printer field can be edited.
- To Update the Printer name enter the new Label Printer name and Select Update.
- Check the Scanning Location list for the Updated Label Printer name.
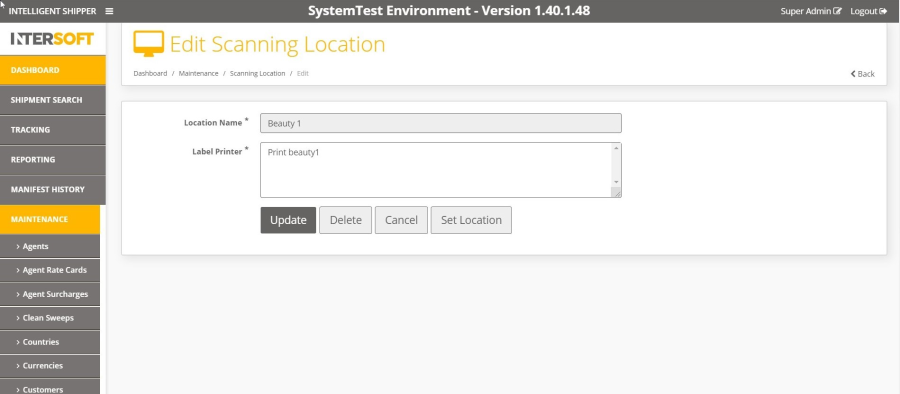
Figure 4: Edit Scanning Location Screen
Note: Location Name Is Unique. Where the Location Name is required to be edited, User would need to create a new scanning location instead of editing an existing Scanning Location.
Delete a Scanning Location
- Select a Scanning location from the Scanning locations list

Figure 5: Delete Scanning Location
- Select Delete option and select Delect Scanning Location on the confirmaiton message.
- Scanning is now deleted. Check the Scanning location list to confirm.
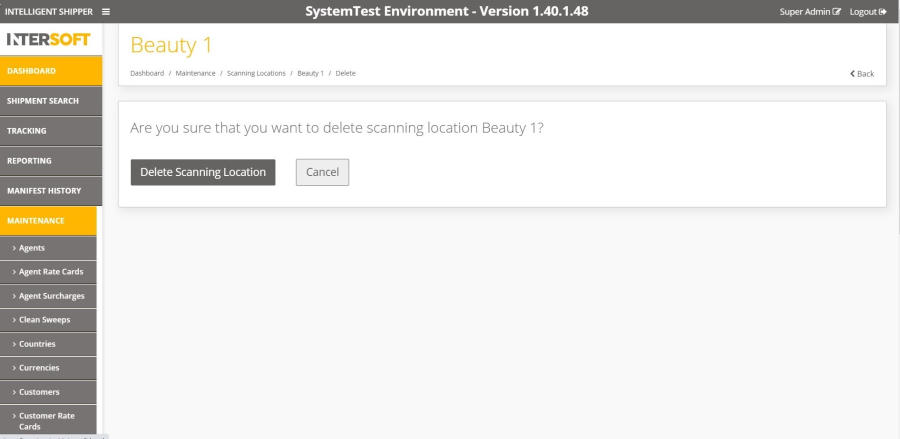
Figure 6: Delete Scanning Location -Confirmation Message
Set Location
Scanning location set will be displayed on the
- Till Pack screen
- DC Scanning screens
Where DC Scanning options is enabled on the System Maintenance screen then the Scanning location set is used for Print Label Webhook, if its active. The printer name set for the location will be the printer sent in the webhook when shipments are scanned at that location and the labels are generated.
- System Admin user logs on iShipper from the user workstation.
- From Maintaince menu, select Scanning Locations
- Select a Scanning Location from the Scanning location List
- Select Set Location
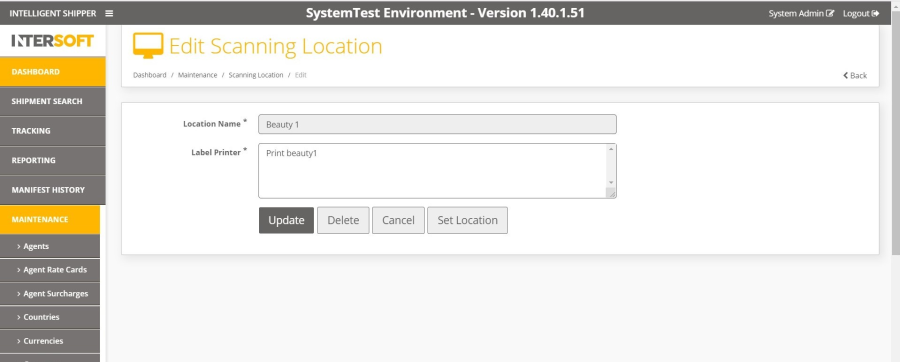
Figure 7: Set Scanning Location Screen
- Select Yes on the confirmation message displayed.
- This scanning location is now set for the user workstation.
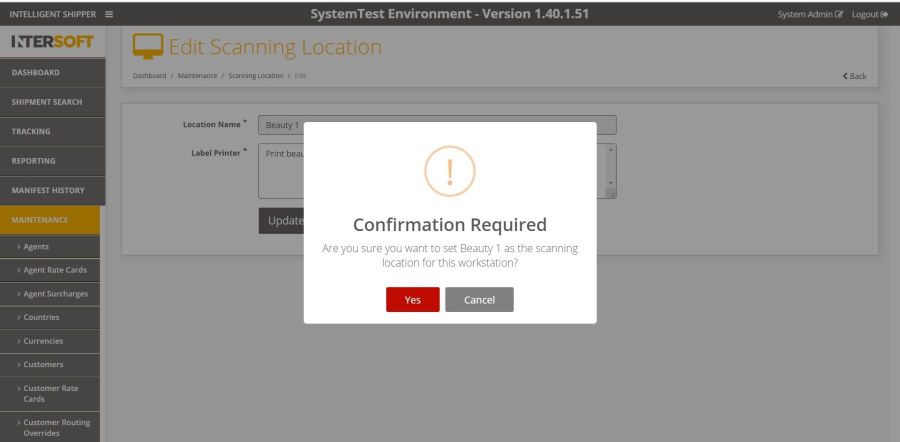
Figure 8 Set Scanning Location Confirmation Message
Bulk Upload Scanning Locations
To Bulk Upload scanning locations select Bulk Upload Scanning Locations option. 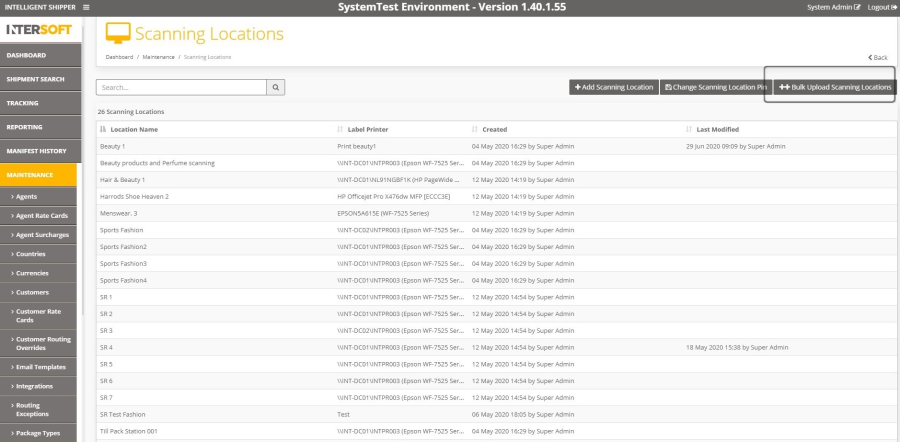
Figure 9: Scanning Location - Bulk Upload Scanning Locations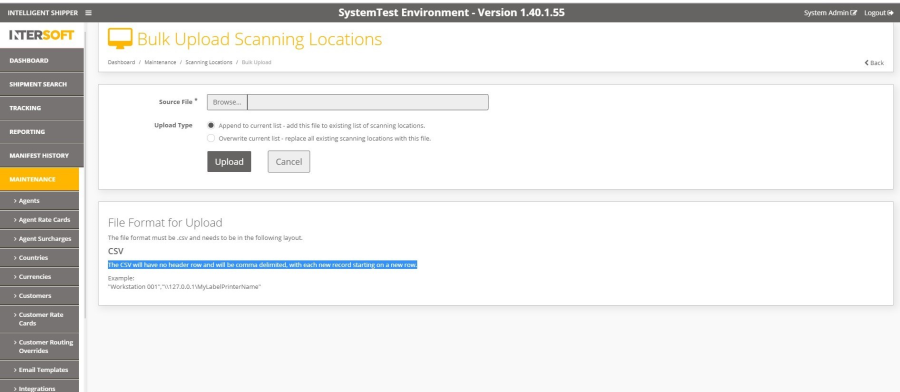
Figure 10: Bulk Upload Scanning Location
- Bulk Upload File must be in a CSV format and the file layout will be as below
The CSV file will have no header row and will be comma delimited, with each new record starting on a new row.
Example: "Workstation 001",\\127.0.0.1\MyLabelPrinterName
- To Upload a scanning location file, select Browse option and select a Scanning Locations Source file and Select Upload.
- Select Upload Type
- Append to current list - add this file to existing list of scanning locations.
- Overwrite current list - replace all existing scanning locations with this file.
- Select Upload
- The file will be uploaded and the scanning locations in the file will either be added to the existing locations or overwrite the existing locations, depending on the selection made on upload.
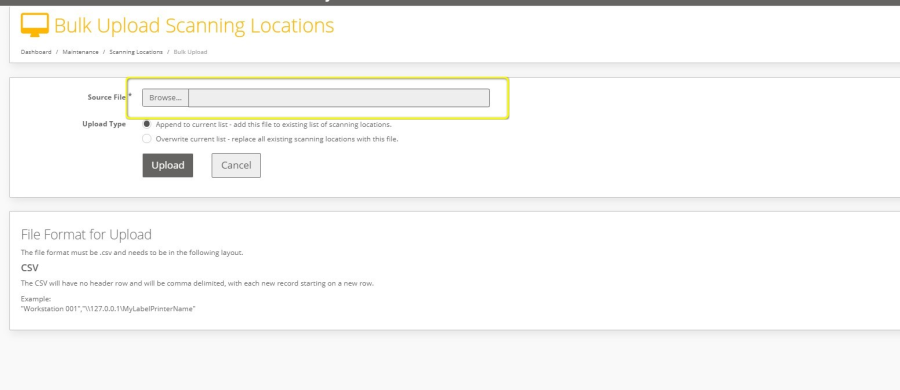
Figure 11: Bulk Upload Scanning Locations – File Upload
Scanning Location PIN
System Admin can Set and Change the scanning location PIN which is required when changing the scanning location on either the Till Scanning or DC Scanning screens. The Scanning Location PIN is set at system level, so all System Administrators will use the same PIN to change location on these screens.
- To Set the Scanning location PIN, click on the Set Scanning Location PIN option
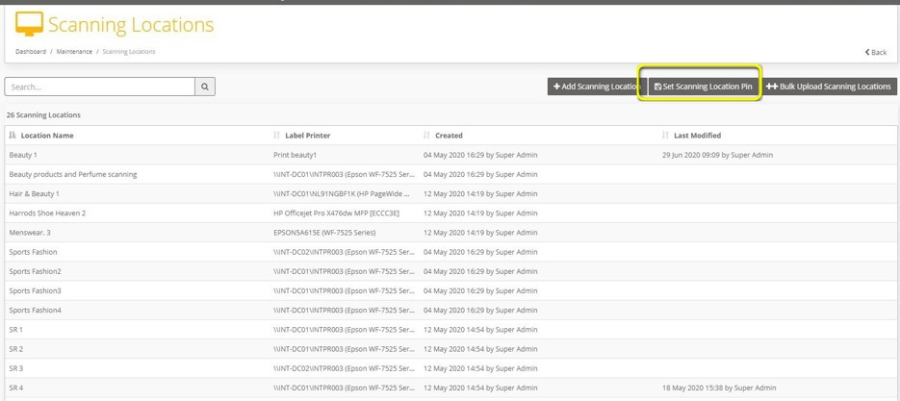
Figure 12: Set Scanning Location PIN option
- Enter a numerical value between 4 and 6 digits as the PIN in the pop up and confirm the PIN.
- Select Set PIN and the Scanning Location PIN is now set.
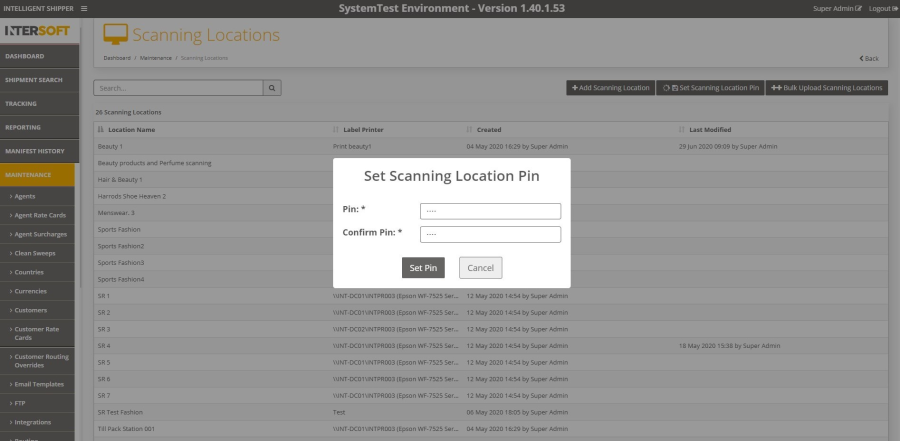
Figure 12: Set a 4-6-digit number PIN
- A confirmation message is displayed when the PIN is set successfully.
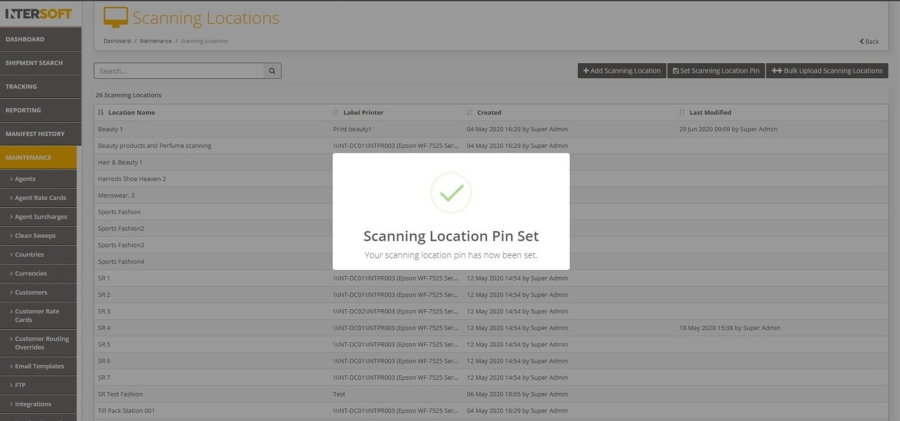
Figure 13: Set a 4-6-digit number PIN
Change Scanning Location
When the System Admin sets the Scanning location PIN, the option of Set Scanning location PIN changes to Change Scanning Location PIN.
To change the PIN, select Change Scanning location PIN option
- Enter the current PIN
- And Enter the new PIN 4to 6-digit numerical value
- Confirm the new PIN
- Select Change PIN
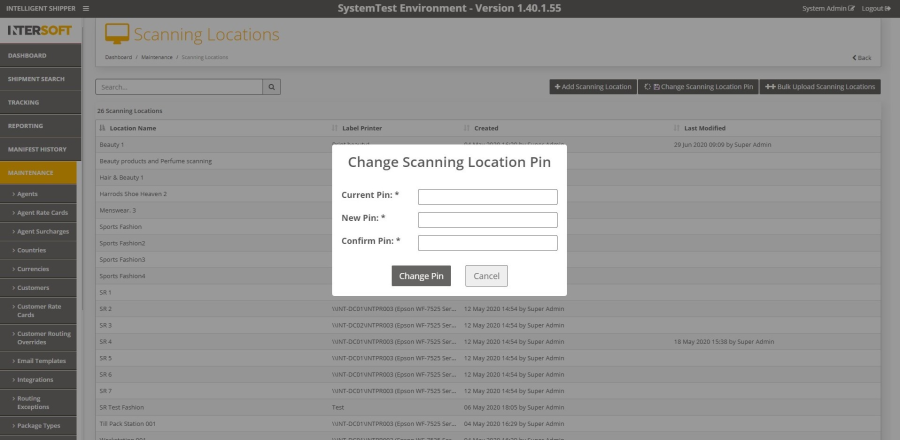
Figure 14: Change scanning location PIN
- Scanning Location PIN is changed successfully, and a confirmation message is displayed.
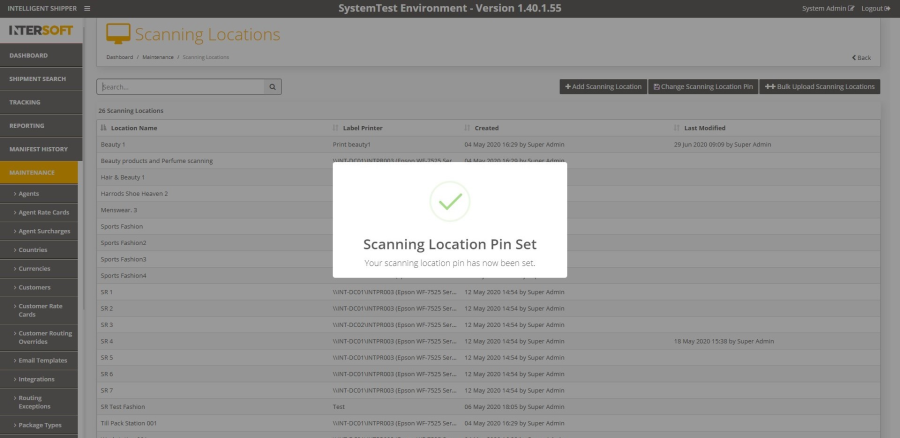
Figure 15: Change scanning location PIN
Error Handling
- Error message displayed when the PIN is less or greater than 4-6-digit numerical value
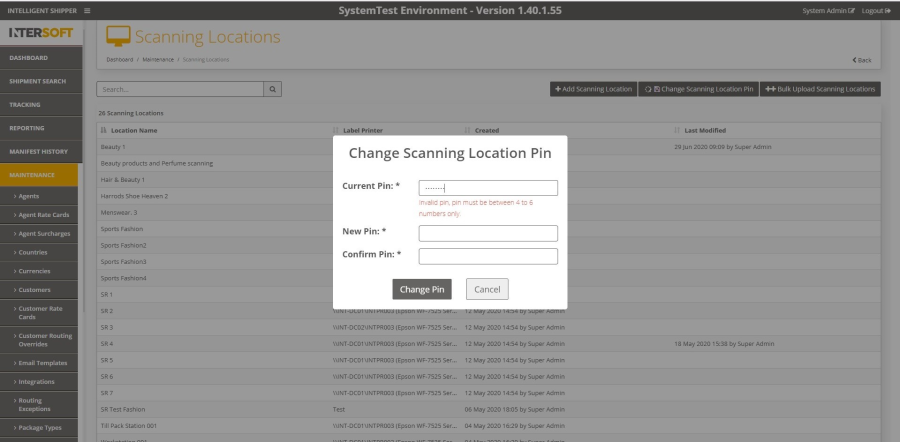
Figure 16: Error Message when PIN is less or greater than 4-6 digits
- Error message displayed when an incorrect PIN is entered
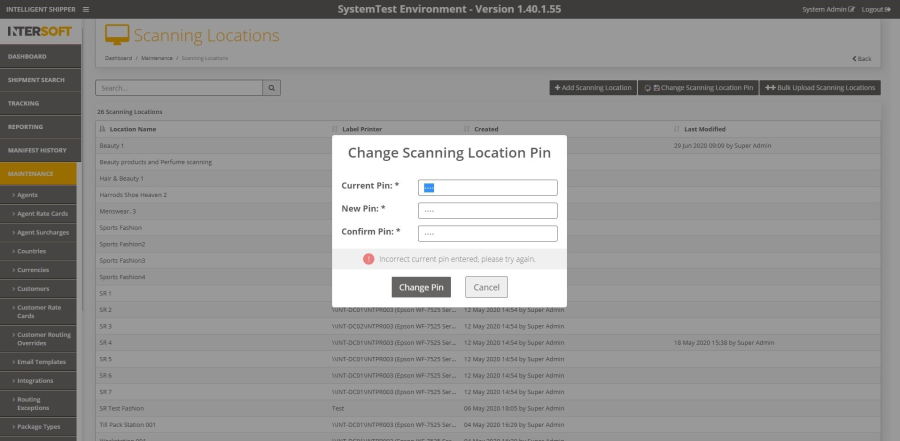
Figure 17: Error Message when Incorrect PIN in entered
- When changing the PIN and the New PIN & Confirm PIN does not match then error message is displayed.
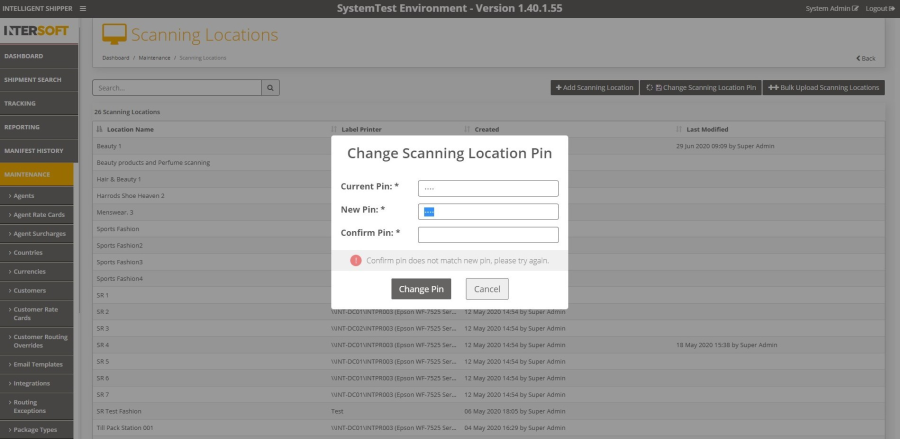
Figure 18: Error message when the New PIN entered does not match the Confirm PIN
Bulk Upload Scanning Location Errors
- Error message displayed when the file uploaded is not .csv format
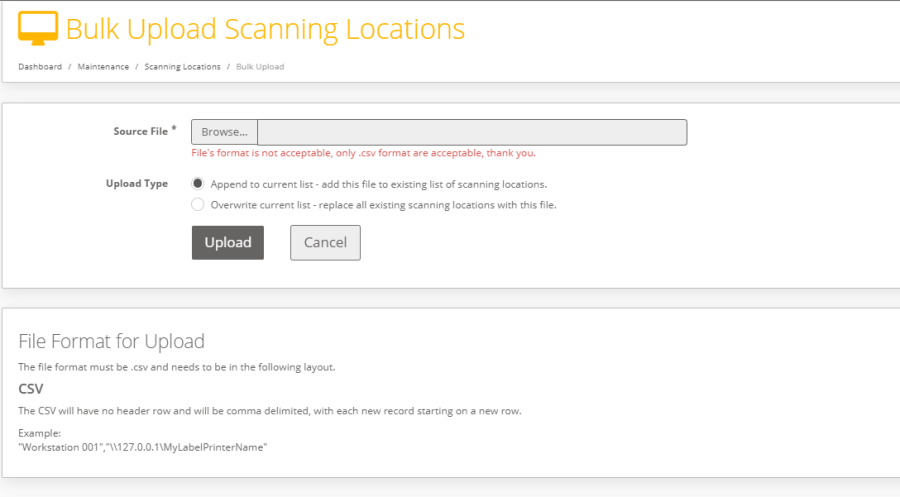
Figure 19: Error when file format is not .csv
- Error message displayed when the file had duplicate scanning location
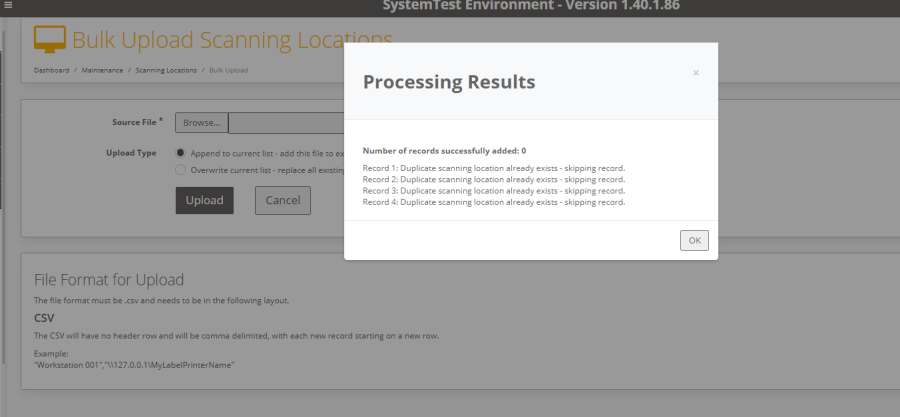
Figure 20: Error – Duplicate records in the file uploaded
- Error message displayed when file fails validation – required fields
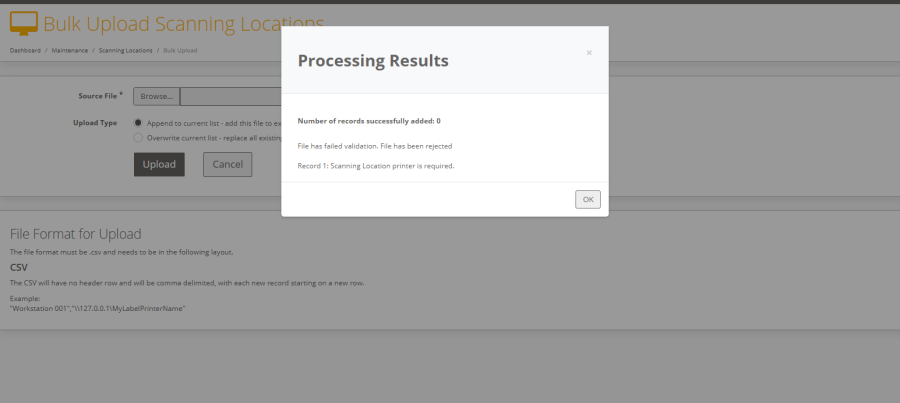
Figure 21: Error – File Validation failed