How To: Upload Data File using Bulk Mailing?
- Arnold Christian
- Victoria Slade (Unlicensed)
- Vinay Damagatla
Owned by Arnold Christian
When user wants to create Shipments in Bulk using CSV/ASCII/pipe deliminator Data File.
Step-by-step guide
- Login to iShipper using your registered credentials.
- Navigate to Dashboard - Shipment Processing
- By clicking on Bulk Mailing Button user will be navigated to Bulk Mailing screen.
- Select +Upload New Data File.
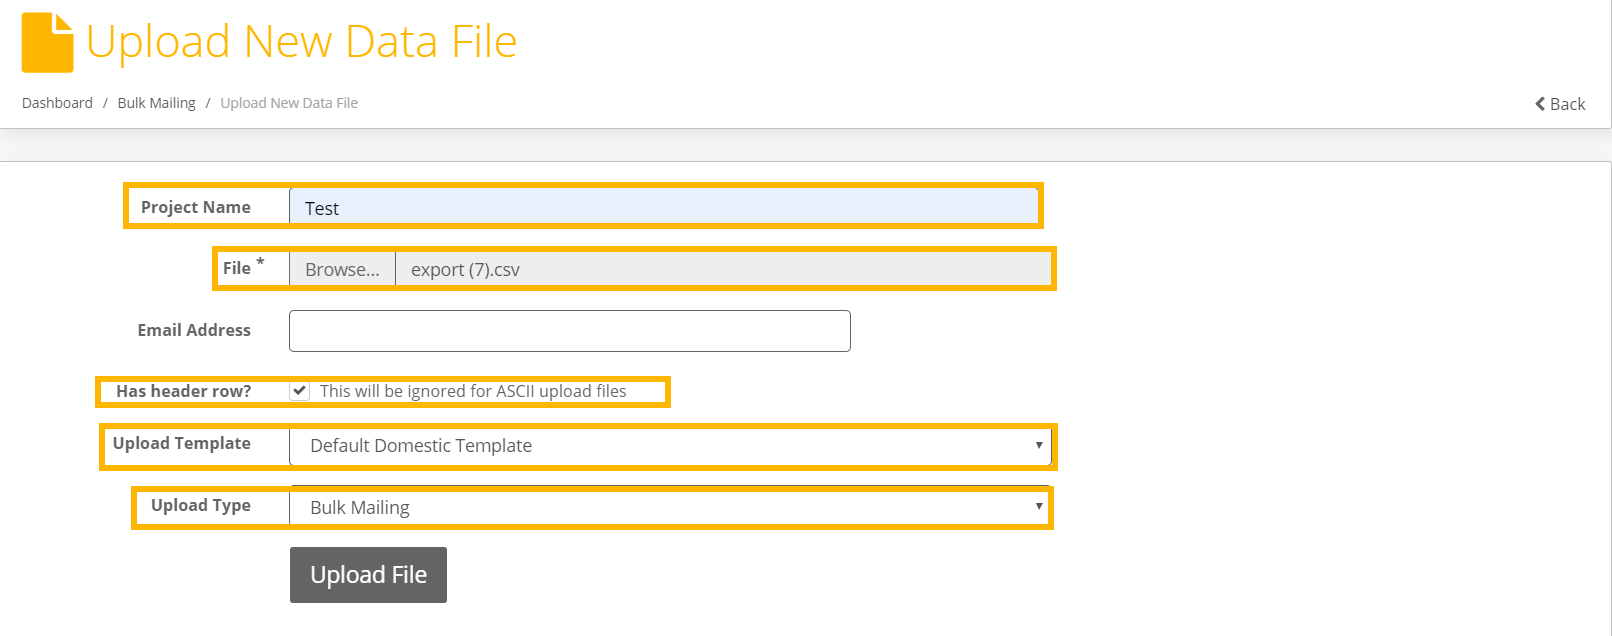
- User will be navigate to Upload new Data File Screen.
- Enter Project name(i.e.Orders for USA)
- Click on File and select data file to upload.
- Has header row? - select this option if your data file has a header row(This will be ignored for ASCII upload files)
- Upload Template: Select the template which is used to create Data File.
- Upload Type: Select Bulk Mailing if you want to generate labels via Data File - Shipments created using this option will be in processed State)
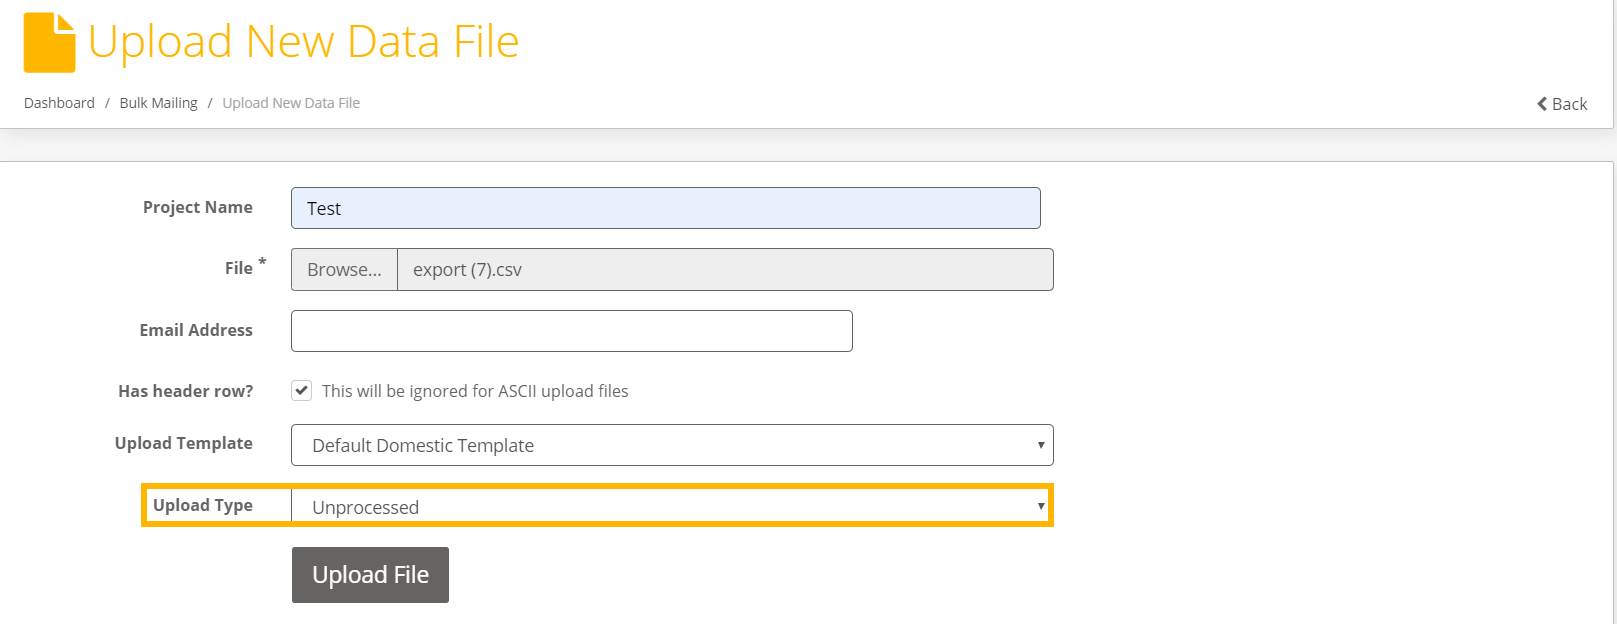
- Upload Type: Select Unprocessed if you want to create shipments but do not want to generate Labels - Shipment create using this option will be in unprocessed state.( To generate label see Scan Unprocessed Shipments)

Related articles