How To: Create Shipment using Booking Wizard
- Arnold Christian
- Victoria Slade (Unlicensed)
Owned by Arnold Christian
When user wants to book or create Shipment using Booking Wizard
Step-by-step guide
1. Login to iShipper
2. Navigate to Shipment Processing - Booking Wizard.
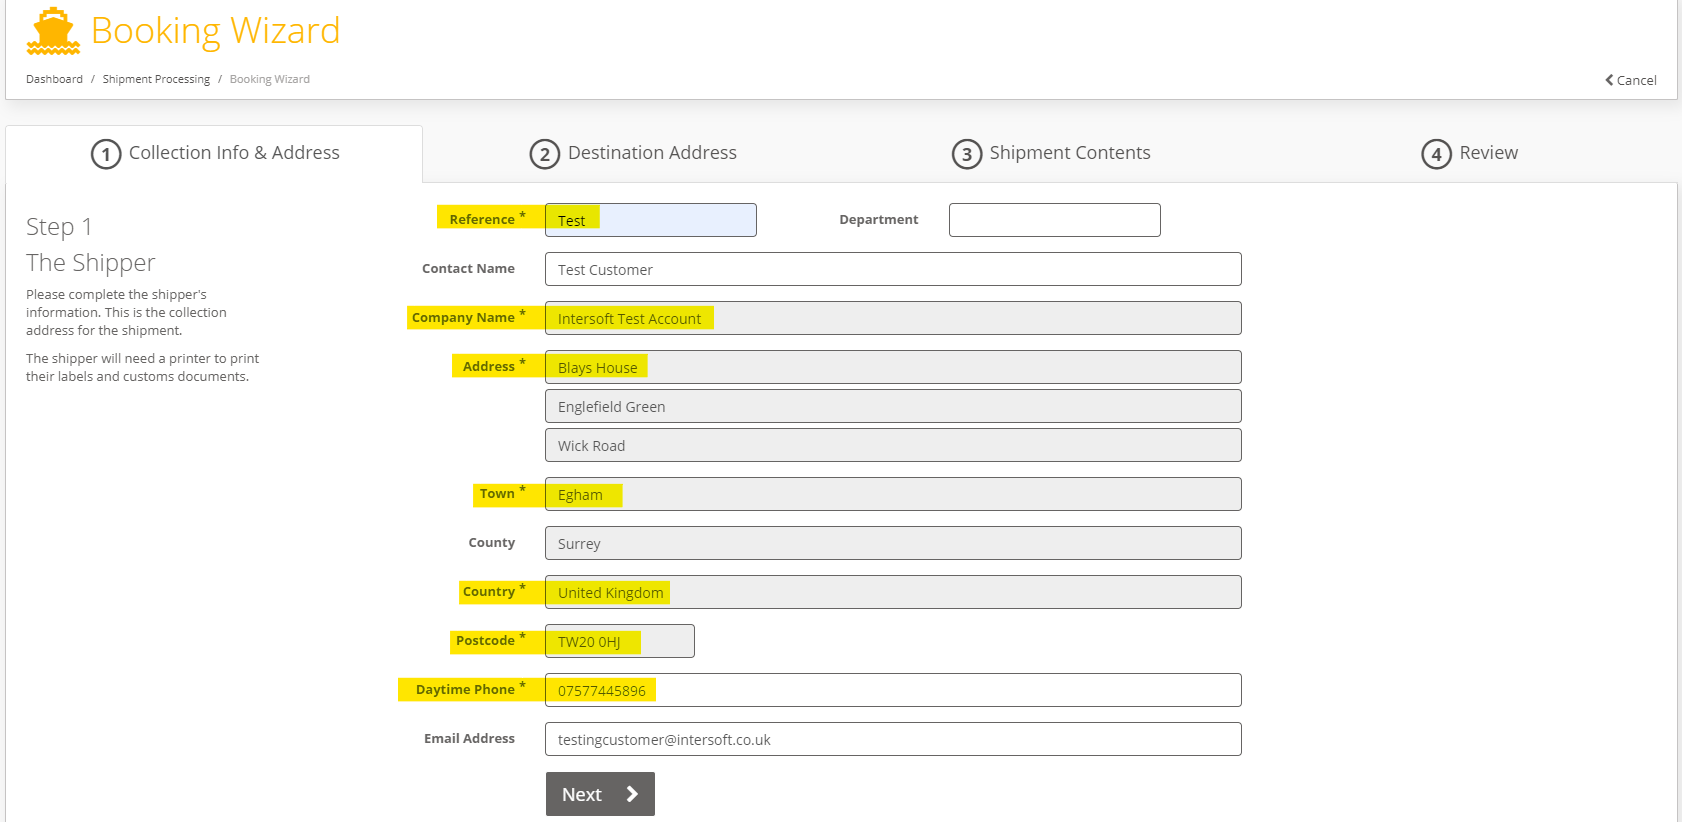
- Collection Info & Address. - Please complete Required fields(Marked with "*" sign)
- Reference - Your Booking or Order Reference number.
- Collection address or Customer address - Will populate automatically.
- Email Address (Optional) - Provide valid Email Address.
3. Click on Next Button.
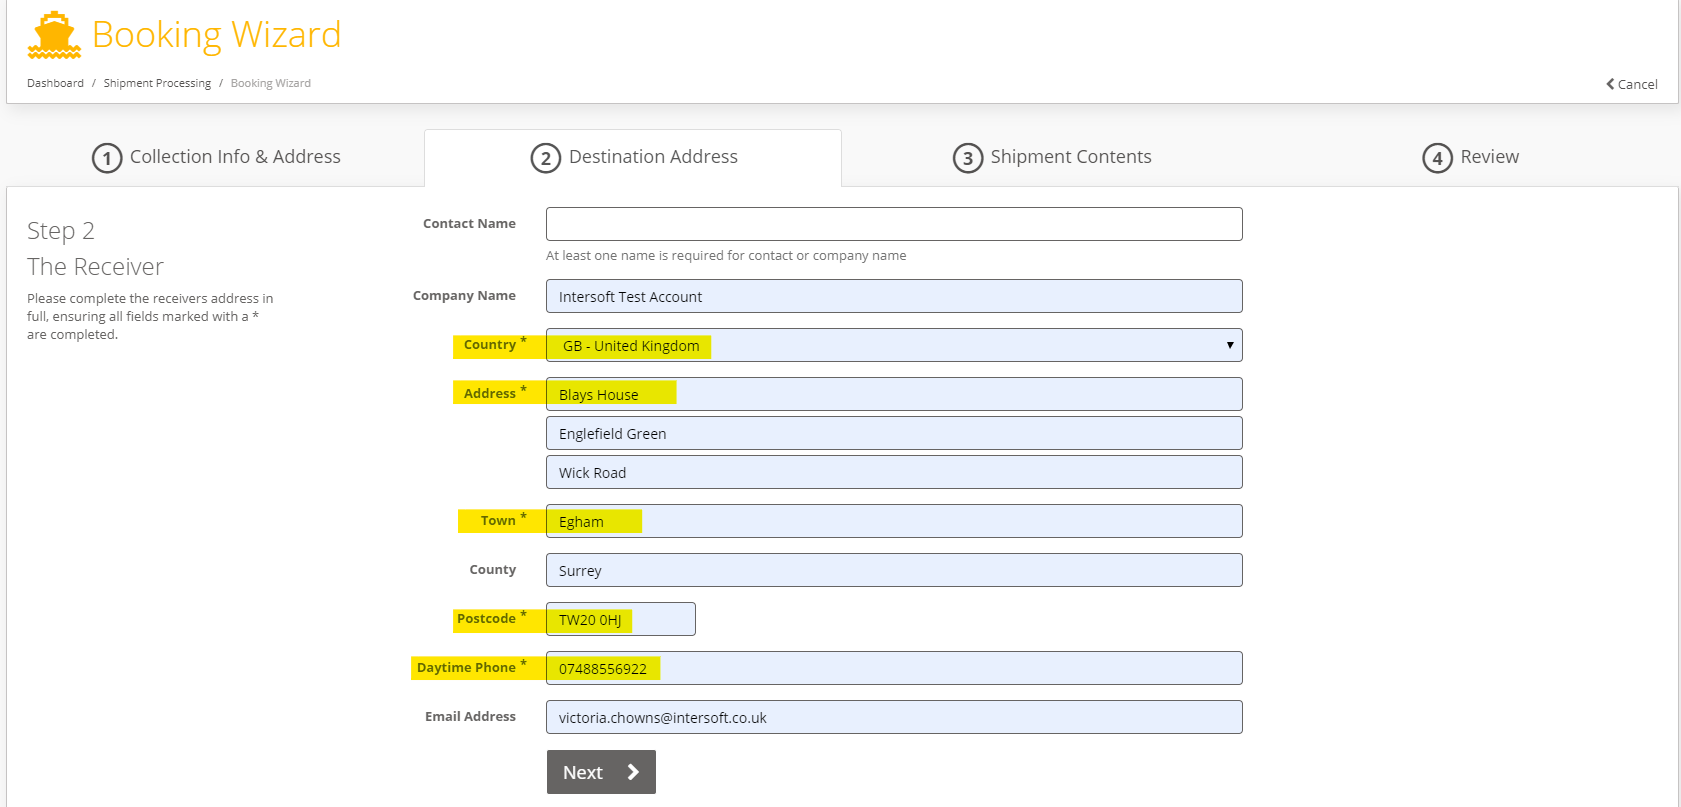
- Destination Address. Please complete all required fields(Marked with "*" sign)
4. Click on Next Button.
5. Shipment Contents. Please complete all Required fields (Marked with "*")

6. Click on Next Button.
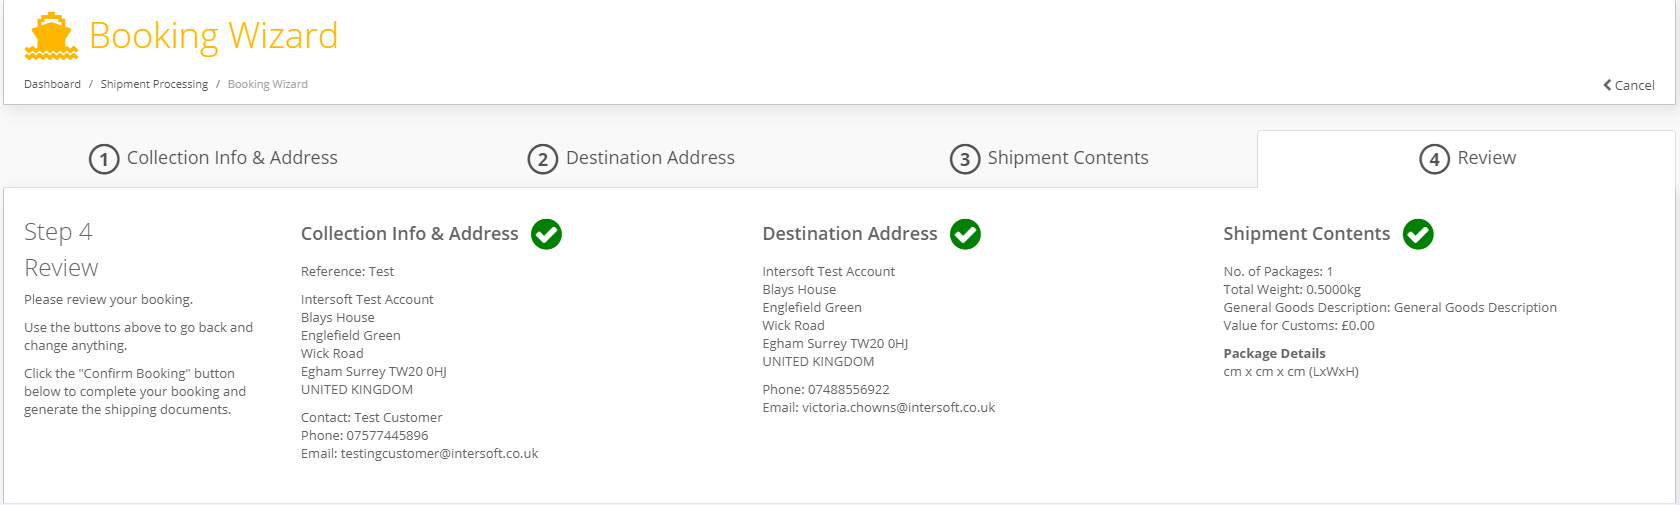
7. Review - displays information provided in Step 1 to Step 3.
8. Following this you will need to:
- Select the service, you want to use to ship the shipment by Clicking Confirm Booking button.

- Once shipment has been created Successfully, the confirmation page will be displayed with Tracking number of the Shipment.
- You can download the label using Print your Label Button.
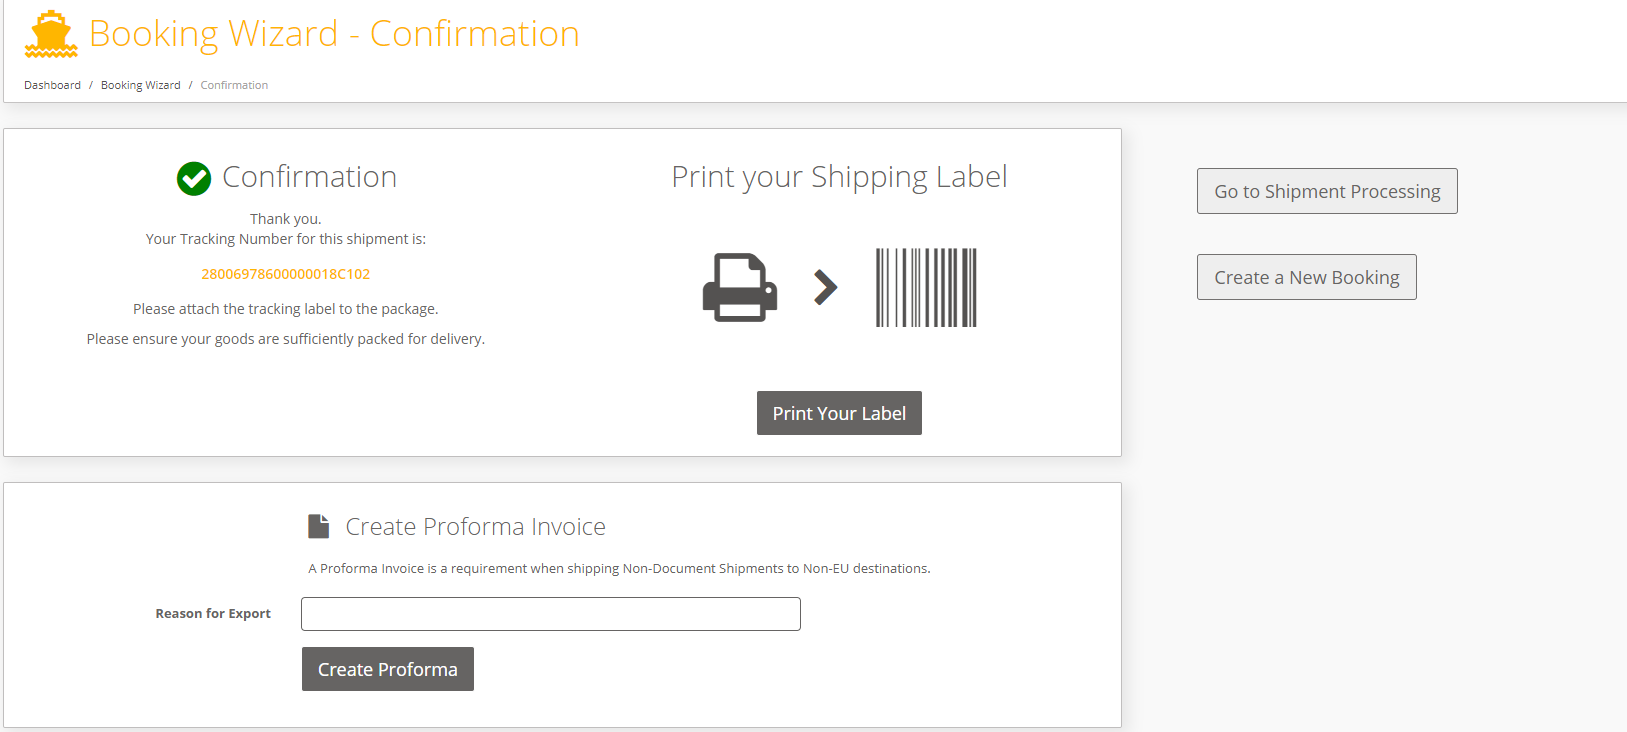
- Click on Create a New Booking button, if you wish to create another Shipment.
- Click on Go to Shipment Processing button, if you wish to Close out / Manifest the shipment/s created.
Related articles