Intelligent Shipper
Adding Countries User Manual
Version 1.0
Document Owner |
INTERSOFT Systems and Programming Limited |
Version |
1.0 |
Date |
30 July 2020 |
Description |
Instructs System Admin users how to setup and maintain Countries |
Author |
Matthew Dobson |
Commercial and in Confidence
The information contained in this document is confidential. No part of this document may be reproduced, disclosed to any third party, or issued in any form or by any means without the express written permission of Intersoft Systems & Programming Ltd.
Document Controls
Version History
Version |
Amendments |
Date |
Author |
V 0.1 |
First Draft |
22/07/2020 |
Matthew Dobson |
V 1.0 |
Updates post Review feedback |
30/07/2020 |
Matthew Dobson |
Review
Name |
Title |
Date Reviewed |
Version Reviewed |
Victoria Smith |
Customer Success Executive |
29/07/2020 |
V0.1 |
Laura Price |
Head of Business Analysis |
29/07/2020 |
V0.1 |
Contents
1. Document Controls
2. Table of Figures
3. Introduction
4. Add Country
4.1. Services
4.2. Returns Gateway
4.3. Notes
Table of Figures
Figure 1 - Configured Countries
Figure 2 – Add Country Details Tab
Figure 3 - Services Tab
Figure 4 – Remove Service Confirmation Prompt
Figure 5 - Returns Gateway
Figure 6 - Consolidation Point Configuration
Figure 7 - Country Notes
Introduction
The aim of this user guide is to provide a walkthrough of the steps required in order to successfully add countries into your MCSS system which once configured will confirm the locations you can provide shipments to.
Add Country
Once logged into your Intelligent Shipper system, the Countries tab will be accessible via the left-hand menu or will be displayed by selecting the maintenance tab.
After the countries tab has been selected this will display the countries that have been configured in your system. The configured country name, ISO code, Gateway Code, Country Group, Default Agent, Confirmation of Export and /or Returns enabled, date of creation and confirmation of the last user to update the Countries tab shall be displayed.
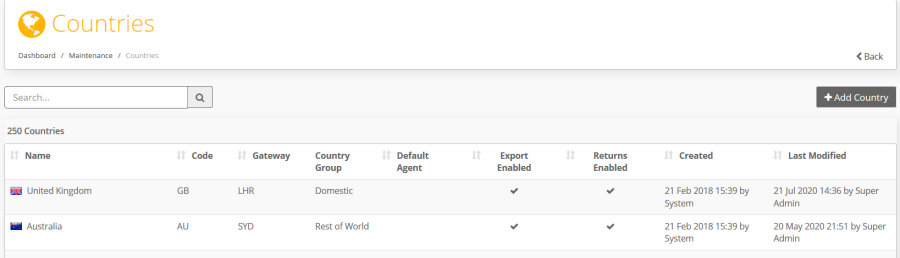
Figure 1 - Configured Countries
Selecting the 'Add Country' button will load the screen shown below, from here it will be possible to configure a country so that can be used for sending shipments.
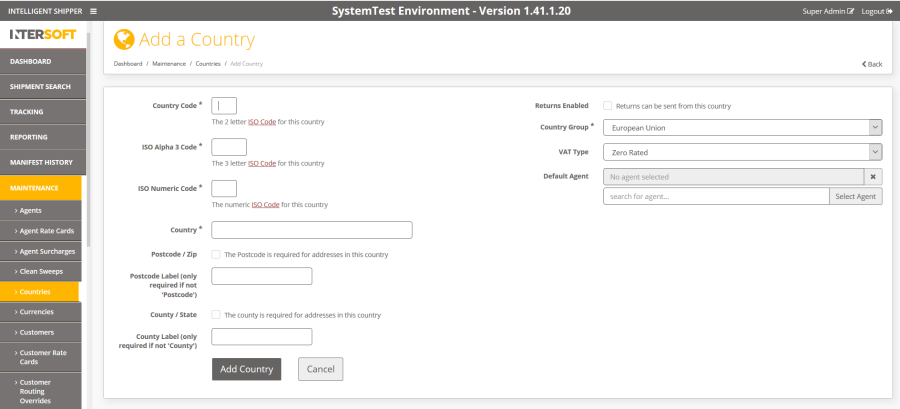
Figure 2 – Add Country Details Tab
- A two letter ISO country code will require to be added in the 'Country Code' field, the lists of ISO codes and ISO can be found under https://www.nationsonline.org/oneworld/country_code_list.htm or via the hyperlink displayed on Intelligent Shipper
- A three letter ISO code will also be required to be entered in the 'ISO Alpha 3' Code field
- Next input the ISO Numerical Code
- The next field will require the populating with the name of the country you wish to add into the 'Country' field
- There is a 'Postcode / Zip' checkbox to confirm if this country will require postcodes added for this address, in the event this checkbox is ticked, it will be mandatory to input a Postcode / Zip in order to create a shipment
- The 'County / State' checkbox can be ticked for the event that Country utilises Counties or States
- The 'Postcode Label' field can be used to specify the wording to be used, either Postcode or Zip code
- Selecting the 'Returns Enabled' checkbox will allow for Returns to be accepted from the chosen country
- The following field is the 'Country Group', it will be possible to select from Domestic, European Union and the Rest of World and this will determine if a shipment is dutiable for import charges and if customs documentation will be required
- The next drop-down menu will be used to select the 'Gateway Code' which is the main entry point for a country that shipments will be transported via
- Next it will be required to confirm if 'Value Added Tax' will be applied to shipments via the drop-down menu, there will be three options available, Zero Rated, Vatable, or different. In the event Zero Rated is selected, no VAT charges will be applied. If Vatable is checked, Value Added Tax will be applied for these shipments
- The final field on the details tab will allow for a 'Default Agent' to be selected for a chosen country
Services
The services tab will display the services that have been configured for a selected country, in order to remove a Service for a selected country, select the delete icon and select 'Remove' on the confirmation prompt, clicking the 'Cancel' button will return the user back to the Services tab with no amendments made.
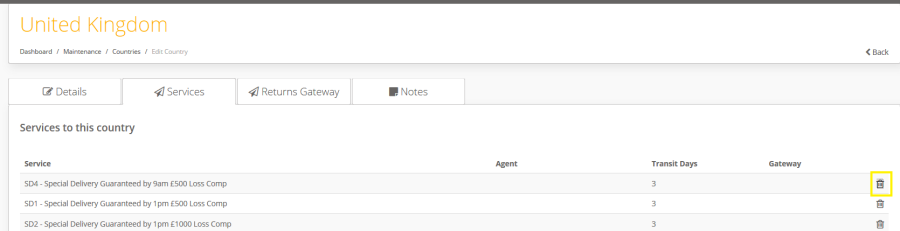
Figure 3 - Services Tab
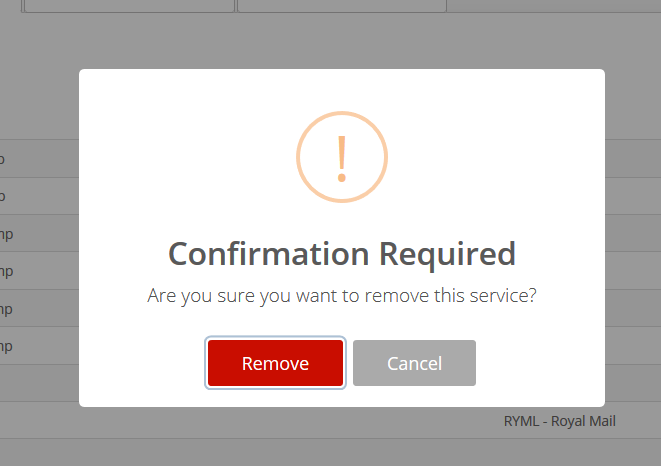
Figure 4 – Remove Service Confirmation Prompt
Returns Gateway
In the event Returns have been enabled for a chosen country via the Details tab it will be possible to set-up the address for the Returns to be sent to.
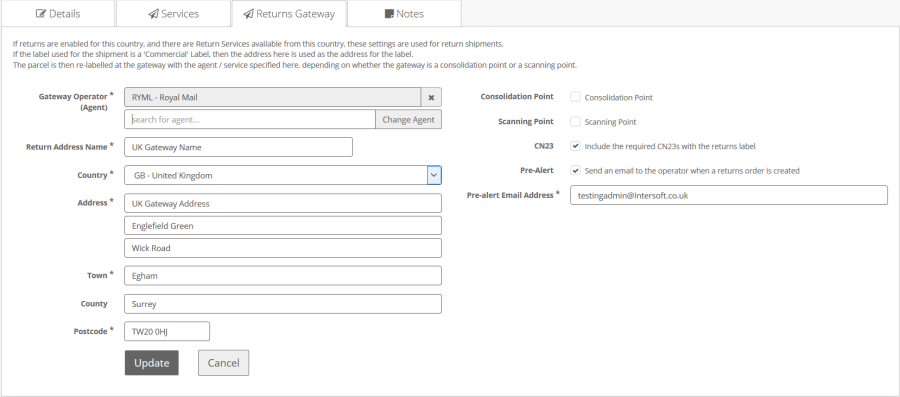
Figure 5 - Returns Gateway
- In order to select a Returns Operator, click the 'Change Agent' button which will provide a list of configured Returns Agents
- The field 'Returns Address Name' should be inputted with the business name the Return is to be sent to
- The Address, Town and Postcode field are mandatory and will require populating in order to enable Returns
- Clicking the 'Consolidation Point' will launch a drop-down menu from which it will be possible to select an Agent that the Returns will be handled by and the service to be used on the shipments return journey when routed through a consolidation point
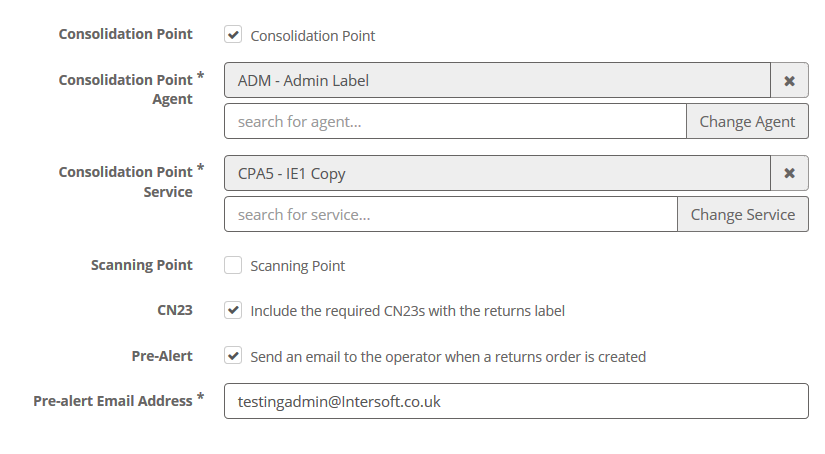
Figure 6 - Consolidation Point Configuration
- Clicking the 'Scanning Point' checkbox will launch a drop-down menu from which it will be possible to select a configured agent and service to be used in the event the Returned shipment passes through a scanning point
- If checked, the CN23 checkbox will ensure that a CN23 Customs Declaration is generated with the returns label
- In the event the 'Pre-Advice' checkbox is ticked, it will be mandatory to input an email address that will receive confirmation when a Returns order has been generated
Notes
It is possible via the Notes tab to provide specific notes for a specific country in Intelligent Shipper. If DC Scanning has been enabled in the system and country notes have been configured for the country group the country is in, then these notes will be displayed when shipments to that country are DCOUT scanned. If DC Scanning is not enabled in the system, country notes do not need to be entered.
Once the notes have been inputted select the 'Update' button in order to confirm the note that has been inputted, once added this note will then be visible under the Notes tab in MCSS.
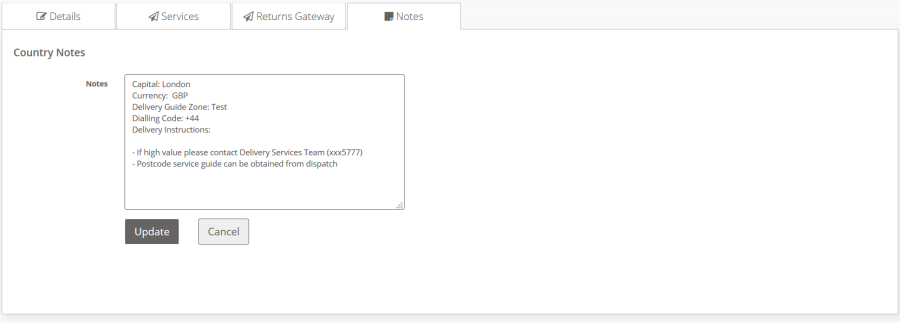
Figure 7 - Country Notes